The arrival of Link Joker and the Lock mechanic changed the game meta by making it harder or impossible for your opponents to make certain kinds of plays and thus became a strong anti-meta strategy.
In this post, I'll go through the 4 main subspecies of Link Joker and highlight their main strengths as well as ways of playing around it. I have no decklist to offer because I do not play Link Joker, but as as a strong anti-meta clan, it is important to know what LJ can do and what you can to circumvent it.
Glendios
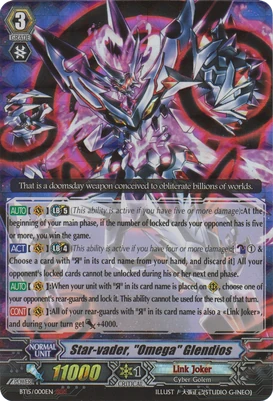
I placed Glendios separately from the rest of the Star-vaders because its playstyle is different enough to distinguish itself from the other Star-vader bosses. Omega Glendios is a unit with an additional built in win condition at LB5, where at the beginning of the Glendios player's turn, if his opponent has 5 or more locked cards, the Glendios player automatically wins the game.
This win condition was incredibly difficult to fulfil when it first came out, but in the Stride Age it is now possible to fulfil the win condition much more easily with World's End.
Let's look at Glendios other abilities. Glendios has an ACT ability at LB4 that when the player pays the cost of 1 CB and discard 1 Reverse, the player can omega lock all of his opponent's locked RG units. This is a strong ability that extends the lock by another turn for potentially 2-3 units, thus further weakening the opponent's offense.
Glendios' third ability is its bread-and-butter lock skill. Basically when a Reverse unit is placed on the RG circle, the player can lock a RG on the opponent's field, once per turn. By locking a front row RG, the Glendios player can completely shut down one column of attack.
Glendios' fourth ability is what allows the whole Glendios deck to function with Reverse from other clans. All Reverse units are treated as Link Joker units, allowing non-Link Joker Reverse units to attack on RG circle, as well as giving them +4k power. This allows RG columns to push for 15k guard with a booster, thus forcing at least 2 cards per turn.
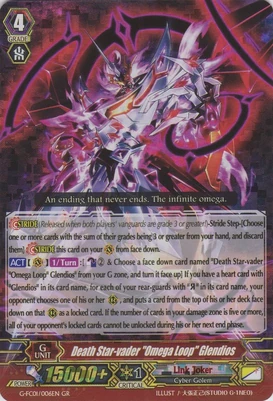
Omega Loop Glendios circumvents the age old problem for LJ players of not being able to lock a unit on a RG circle until your opponent called it to RG circle. Omega Loop enforces the Lock by forcing the opponent player to call one RG from the top of the deck for every Reverse unit that the Glendios player has. In other words, if the Glendios player can have 5 Reverse units on his RG circles, he would be able to activate Glendios win condition at 5 damage. This final turn move which a Glendios player can unlock at 5 damage makes an opponent extremely reluctant to push Glendios to 5 damage, coupled with lock, granting additional survivability to the Glendios player while allowing the Glendios player to gradually grind away at his opponent's strength.
Ways to play against it
-Don't give the Glendios player 5 damage. If he is already at 4 damage after taking 1 damage from your VG attack, use your RGs to attack his RGs. Besides denying him the use of his ultimate ability, you help to weaken his attacks. With consistent lock pressure every turn from Glendios' third ability, you lose one column's worth of attacks while he is able to swing at you with all his 3 columns. If he does not have enough RGs, it may be possible to shut down one of his lanes.
-Give the crit to another unit. If the Glendios player is at 3 damage, and you drive check a critical trigger, you can pass all the trigger effects to a RG even he no-guarded the attack. If you check another crit, you form a 3 crit lane that the Glendios player must guard or he dies. If you do not check a second crit, use the RG unit with 2 crits to attack the Glendios' rearguards. Do not push Glendios to 5 damage unless you are certain he is unable to World's End.
-Snipe his backrow units. The Glendios deck is constructed in a way that is top-heavy (with 12-13 G3s). This means that boosters in a Glendios deck is alot more scarce. If you have a way to retire the back row, you should do so to get rid of various G1 on hit effects that are splashed in a Glendios deck.
-Beware of his Rubidium. Rubidium's ability can only be used in a Glendios deck, and is an extremely strong defensive ability. When the opponent's VG attack is aimed at the VG, Rubidium can redirect the opponent's vanguard attack to a RG circle with a unit with Reverse in its card name. Basically, for virtually no cost, your all in final gambit based on your VG can be wasted by Rubidium (Restanders, Auto-Criters etc). One way to play away it is to snipe his Reverse units, so that there is no unit on the vanguard circle for Rubidium to redirect. Another method is to take note of his drive checks.
Overall verdict: The Glendios deck remains strong and relevant in the Stride Age. Its defensive capabilities based on locking, LB5 deterrent and Rubidium makes it hard for a opponent to end the game. Even if a deck based solely on twin drive may seem weak in today's meta, it also means that a Glendios deck is unlikely to ever deck out, and its defensive abilities allows it to keep up with newer decks.
Messiahs
Messiahs are the G-Link Joker units that focus on locking on their own RGs to gain abilities and power up. As a G-era deck, the deck's ace are the two powerful Messiah strides, Amnesty and Excelics Messiah.(Ok, Amnesty is kinda outdated now, entirely surpassed by Excelics, the same way that Aurageyser Doomed has surpassed original Aurugeyser)
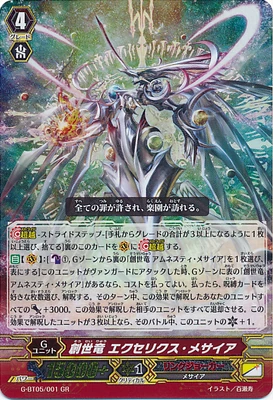
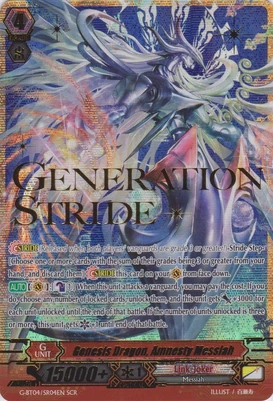
The premise of both Excelics and Amnesty are simple. They give the ability to unlock any number of RGs on both the Messiah player and the opponent's fields, and if 3 or more cards are unlocked, they gain +1 critical. Excelics has an additional effect of retiring all unlocked opponent RG units, thus permanently weakening the opponent's field. Additionally, Messiahs have also recently gained the support of new units that unlock in the battle phase, thus giving them multiple attacks to bolster their offence. As a result, Messiahs are a strong LJ archetype that combine the defensive power of Lock with offence coming from a strong VG column and multiple RG attacks.
Ways to play against it.
-One of the most glaring weakness of a Messiah deck is that it is much slower than the other Link Joker archetypes to lock the opponent's defence. It suffers from the same weakness as all other G-era decks, in that it is virtually vanilla until GB1 is unlocked. That means that it is possible to go on full offense 1-2 turns more before your units will be locked compared to the other pre-G era LJ archetypes.
-It is also slow in the sense that its' advantage engine only really builds up from GB2 onwards. Messiah's breakstride unit, Alter Ego Messiah provides a defensive GB2 ability on par with Choas Breaker Dragon that allows the Messiah player to draw a card for each unit unlocked, for the cost of 1 soulblast. To aggravate things, Excelics retires each unlocked unit on the opponent's field, creating even more bonuses for the Messiah players. Messiah players will want to activate the GB2 ability as soon as possible by striding Blizza so as to unlock GB2, while unflipping to setup for Excelics next turn. By doing so, the Messiah's player offense is compromised.
-As a result, it is possible to push Messiahs to high damage early or weaken it by targeting key RGs (eg. Lady Battler of the White Dwarf) such that their late game is not as strong as it can possible be.
Starvaders
The original Link Joker; Star-vaders have evolved a great deal with new support for the Starvaders more recently. There are a wide variety of units with strong Lock effects because they do not need stride to activate their effects, since most of them are old cards. With some additional revival units, they become really great throughout all stages of the game. I'll only be focusing on Chaos Breaker Dragon which received support recently.
Chaos Breaker Dragon has quickly returned to the meta with the introduction of its new stride as well as G3 fall ride.
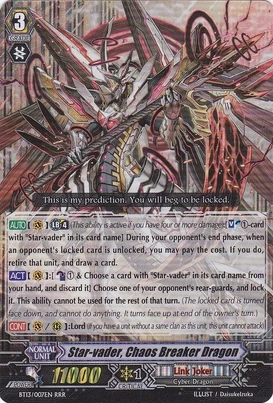
CBD's LB4 gives it immense defensive card advantage by allowing it to soulblast 1 to retire a locked card from the opponent's field and draw a card, resulting in a -1/+1 advantage. With soulcharging support, the CBD player can draw numerous cards over the course of a few turns, and coupled with the defensive advantage gained from locking down one column, is a tough combination to beat.
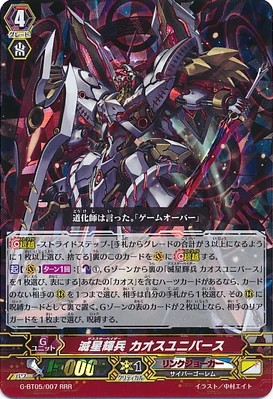
Chaos Universe is the new stride for CBD that updates it for today's meta. When Chaos Universe's ACT skill activates, G-Persona, CB1 and the opponent is forced to call a unit from hand onto an open RC of the CBD player's choice. This card guarantees consistency in locking the front row, a problem previously countered by the opponent playing carefully not to call front row RGs, or removing them with their own unique mechanic (Murakumo, SP etc). If the CBD player has 2 or more face up units on the G-Zone, Chaos Universe gains the additional ability to lock another unit for free.
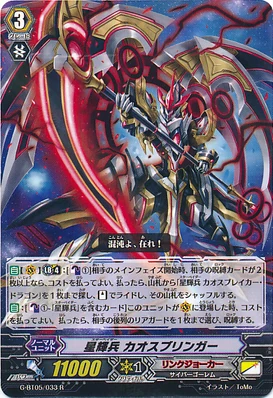
Chaos Bringer is the fail ride for CBD. It's LB4 ability allows you to CB1 during your opponent's main phase if it has 2 or more locked cards, to search out a CBD from the deck and ride it as stand. It's on call ability also allows it to CB1 to lock an opponent's unit in the backrow. The LB4 ability is great as it ensures CBD arrives on the Vanguard to activate its LB4 ability when the opponent's units unlock at the end of their turn.
With the new stride and fail-ride, the CBD deck gains incredible locking consistency on first stride and the ability to search out the CBD easily, coupled with the original strength of the CBD deck that works pre-stride. With Chaos Bringer, the CBD can easily counter GB1 decks since both RG columns can be locked by G3 turn with their native lock skill and 1 Photon .
Ways to play against it
-Above all, play smart. Since you know that Chaos Universe can lock your front row, and you can afford it, why not flood your front row? Chaos Universe becomes alot more 'meh' when used to lock the backrow.
-Dont try to grade stall it unless you are also playing a pre-GB1 deck.
-CBD is a strong defensive deck but it lacks in offensive power. Use that to your advantage by rushing early (if you can) or stride over a few turns to wear down your opponent.
-Snipe key units if possible (eg. LB enablers) through retires if you can.
-Damage control (sometimes attacking his RG is better than just giving him one free CB). Pay attention to the drive checks, sometimes he may not have replacements.
-Don't play Aqua Force. :)
Deletors
The Deletors are a LJ subclan that focus on "Deleting" the Vanguard. Their unique mechanic allows them to force the opponent to flip the Vanguard face down, causing the opponent's Vanguard to lose all text (as well as any abilities that they have) and their native power. This means that a Deleted Vanguard has 0k power. Deletors became a crazy anti-meta subclan for a while based on how difficult is it to guard when your Vanguard is deleted and nullifying all effects and abilities on the VC. However, when the coming of the Stride Age and its ability to nullify Delete, Deletors lost popularity because its chief mechanic can be so easily countered.
Despite this, a competent Deletor player can still cause you alot of pain. The good thing about facing a Deletor deck is that the main gambit of Delete is very resource intensive.
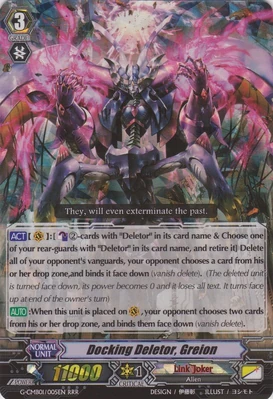
Docking Deletor, Greion's skill allows you to Delete the Vanguard for the cost of 2 CB and Banish Delete a card from your opponent's drop zone for the alternative win condition based on Banish Delete. Pretty standard for a Deletor deck although Greion is considered to be one of the lower costed Deletor Vanguard.
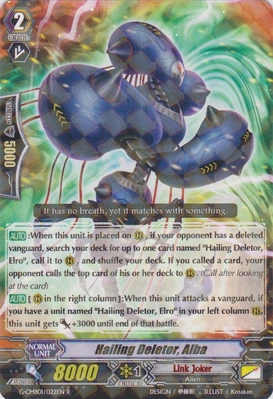
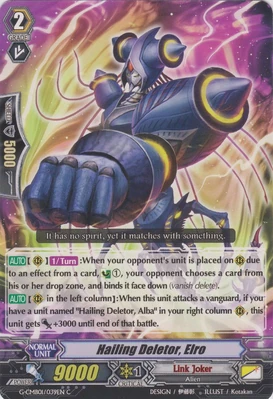
However, what is truly formidable about a Deletor deck is the ability to abuse the Deleted Vanguard to force the opponent to drop 2 or more cards just to guard a simple RG attack.
Ways to Play against it
-Deletors are very CB heavy: Try to engage in damage control if possible. Eg. If for some reason the Deletor player has only one open CB and you know that he is going to ride to G3 next turn, it could be a good idea to attack his RG instead, since you know that Deletors need alot of counterblasts to activate their effects. In short, if the Deletors cannot Delete, they are pretty manageable.
-Field Disruption: Deletors more than other LJ subclans rely on having some kind of decent RG attacks to force high amounts of shield for guarding from their opponent. Any ability to disrupt field will make it harder for Deletor players to make full use of the heavy cost of their Delete mechanic. Attacking RGs with your VG works as well.
-Don't gradelock against Deletors. They don't need to stride to trigger their effects.
-Be wary of Deletor units that can lock as well.
-Be wary of the Stand triggers. Stand triggers are very strong against a 0k Vanguard.
That's all folks! I hope that the above LJ analysis will help the next time you ever play against a LJ deck by knowing their unique strengths and weaknesses, as well as how you can play around it. Hopefully, that may be sufficient for you to snatch a victory against LJ. It's not easy but it is possible to maximise your chances by following some of tips as outlined above. Leave comments if you have any questions in the chatbox!


