Showing posts with label Deck Recipe. Show all posts

Monday, 13 June 2022

[V-PREMIUM] RAGING FORM Deck Profile

Clearly, we are all here because V-Premium Luard deck got hit by banlist (again). It has become weak, and weakness is a sin, so we all need a new Shadow Paladin deck to be in reigning position (for copium purposes). The Revenger deck seems to be the best candidate for that position right now.

The V-Premium Raging Form strategy design has stayed true to its original design, generating multiple vanguard attacks while converting field to hand. This increases resistance against field-burn decks while increasing hand size for guarding power. The V-series Revenger support line also boasts of powerful low-cost advantage engines, stemming from Dark Cloak Revenger Tartu, Dark Armor Revenger Rinnal, Overcoming Revenger Rukea, and Self-Control Revenger Rakia.

Here's the decklist:

Trigger lineup: 12 crit 4 draw (including 4 Grim Revenger). Why no heals? This is to prevent fail-heal situations which might disable the limit break effect of Raging Form Dragon or the ultimate break effect of Raging Fall Dragon Reverse.

Without further ado, I will now illustrate the strongest one-turn-burst combo available to this deck. All Force I gifts will be placed on the vanguard circle.

Firstly, have Raging Form Dragon as your vanguard. Assemble a full-field of Revenger rear guards. Ensure that you have 5 damage with at least 4 open counterblast.

Attack with one rear guard lane (preferably the lane with lower power).

Attack with the vanguard. End of battle, retire 3 Revengers, superior persona ride into another Raging Form Dragon from hand. Get Imaginary Gift Force.

Raging Form Dragon limit break skill, when placed, counterblast 1 and superior call a Grade 2 or less Revenger onto rear guard. Preferably superior call a Nullity Revenger Masquerade to the now-empty front row rear guard circle.

Attack with both rear guard lanes. Then attack with vanguard. End of battle, retire 3 Revengers, superior ride into Raging Fall Dragon Reverse from hand. Get Imaginary Gift Force.

Attack with vanguard. End of battle, since you are at 5 damage you do not require any locked cards. Counterblast 3 discard 3 to stand the vanguard.

Attack with the final vanguard attack.

As you can see, this extremely powerful scaling burst combo is able to generate a total of 7 attacks (3 from rear guard, 4 from vanguard) and 8 total drive checks, with gradually increasing centreline power. This combo would fail at any moment that you check a heal trigger to heal to less than 5 damage (other than the last twin drive check), so it is recommended not to use any heal triggers in your deck. As the current state is, this is the best output that Shadow Paladin is able to dish out (at least until the next Clan Collection release). Even if you do not win on the spot when you perform the combo, you will be able to push for high damage count, force your opponent to drop his entire hand to guard and survive, and even burn his field to some extent if you have Rinnals to retire. That's it for this post, wait for the next Shadow Paladin update!

Friday, 15 April 2022

[Yu-Gi-Oh! Master Duel] Blue-Eyes with Baronne de Fleur

The sense of accomplishment is so much greater when you bring glory to something that others look down upon. 'Meme deck', 'troll deck', 'non-meta deck', 'deck associated with bad players', they called it. Now, BEHOLD the true power of this deck in the right hands! COME FORTH, BLUE-EYES WHITE DRAGON!!!!

Blue-Eyes Deck from Chemist | Master Duel Meta

The Blue-Eyes combo deck gained a huge improvement in the form of Baronne de Fleur with the first release of new cards in the Yu-Gi-Oh! Master Duel online game. Simply put, one can now make a Crystron Halqifibrax when going first (instead of reserving it for the Selene-Accesscode line when going second). This can be done by normal summoning one tuner and special summoning just one other monster (can be Blue-Eyes Alternative White Dragon, a self-special-summoning tuner such as Tenyi Spirit - Adhara, or even special summoning from the deck using the spell One for One). Once Crystron Halqifibrax is link summoned, you can activate its effect to special summon The White Stone of Ancients directly from the deck. Next, you get rid of The White Stone of Ancients either by using it as link material to link summon a Link-1 monster (e.g. Linkuriboh, Relinquished Anima), or using it as a tuner synchro material to synchro summon a Blue-Eyes Spirit Dragon if you have an additional Level 8 Blue-Eyes monster on the field. That's it for your turn if you go first. At the end phase, activate the effect of The White Stone of Ancients from your graveyard to special summon a Level 8 Blue-Eyes monster from your deck (e.g. Blue-Eyes Abyss Dragon, which can then fetch a Chaos Dragon Levianeer to your hand if you have a Blue-Eyes White Dragon on the field or graveyard). This presence of a Level 8 Blue-Eyes monster is crucial for the next step of the combo.

Subsequently, during your opponent's turn, once he summons a monster (ideally one that has no 'If this card is summoned' effect), during the Summon Response Window, activate the Quick Effect of Crystron Halqifibrax to special summon Formula Synchron from the extra deck. Activate the effect of Formula Synchron to draw a card, and then chain Formula Synchron's Quick Effect to its own first optional effect to synchro summon the Level 10 Baronne de Fleur, using Formula Synchron itself (Level 2 Tuner) and the Level 8 Blue-Eyes monster you special summoned on the previous turn as synchro materials. The end result of this combo is that from one uninterrupted Crystron Halqifibrax, you generate a 3000 ATK monster that is a once-off omni negate as well as once-per-turn targeted effect destruction, along with drawing a card, potentially searching for Chaos Dragon Levianeer to hand, as well as being able to use The White Stone of Ancients to return a Blue-Eyes monster from the graveyard to your hand the next turn.

Previously, the Blue-Eyes combo deck was barely able to make one graveyard negate (Blue-Eyes Spirit Dragon) and one spell negate (Number 38: Hope Harbinger Dragon Titanic Galaxy) if you even have that extremely lucky hand. But now, with much reduced effort, you can bring out a once-off omni negate AND generate advantage, while setting up recovery and combo extension for the next turn to win the game. This is definitely a huge leap forward for the Blue-Eyes deck, which typically was unable to make even one monster negate on the field before the release of Baronne de Fleur. For the record, I utilised this decklist and achieved Platinum I rank on just day 10 of the ranked season, in the midst of all the other greatly boosted combo decks who themselves benefitted from the release of Baronne de Fleur. Additionally, I even clocked a 10-win streak within the Platinum ranks with this deck. It's certainly a marvel to behold, and what's stopping you from using a meme deck IF IT CAN STILL WIN?! For now, this is it for this deck, and I will be awaiting the release of the new Blue-Eyes support from Battle of Chaos (The Dictator of D., Blue-Eyes Jet Dragon, Ultimate Fusion, Blue-Eyes Tyrant Dragon) for the next leap forward.

BLUE-EYES, WHITE LIGHTNING ATTACK!!

Thursday, 14 April 2022

[DIGIMON] GrandisKuwagamon Deck Profile

Hi everyone. It is time for the second Digimon post on this blog. This time, I will be discussing on a OTK (one turn kill) deck, GrandisKuwagamon, from BT-09.

By itself, GrandisKuwagamon (BT9-055) is a decent card but not quite strong enough. However, when combined with GranKuwagamon (P-025), this card is deadly. We will take a look at the 2 main cards as it is pointless to discuss them separately.


First, we have GranKuwagamon (P-025) which has a very basic but strong skill. As a Lv6 Digimon, it is normal to have 4 digivolution sources under it if you hatched it from nursery. By using its skill twice, this Digimon gets <Security Attack +2>, making it a triple breaker. It will be a 11K DP triple breaker by itself, which sounds good but still not crazy strong. Thus, we have GrandisKuwagamon (BT9-055) to bring this up to a whole new level.

It only cost 1 to digivolve GrandisKuwagamon (BT9-055) on GranKuwagamon, but the difference is huge. On digivolve, you can suspend 1 of your opponent's Digimon which allows you to disable 1 blocker easily. During your turn, it also gets +4K DP, making it a 16K DP attacker. Finally, at end of attack once per turn, if you have GranKuwagamon (obviously) or X-Antibody in its source, you can suspend 1 of your opponent's Digimon again, and more importantly, unsuspend this Digimon. In summary, this card has [16K DP, Triple breaker, Double Attack], allowing you to wipe out opponent's security cards in 1 turn. You just need another rookie or hybrid Digimon to finish the game, making it a OTK deck.

The strategy for this deck is simple: Just digivolve to GrandisKuwagamon and win.
The choice of Lv2 to Lv5 cards should not matter too much, but there are some cards which work very well in this deck.
For Lv3, these 2 cards are a must. Kokuwamon X Anti-body allows you to search top 3 for Insectoid (Grandis or Grankuwagamon), while Palmon gives you <Jamming> and allows you to attack without fear.


For Lv4, I think Weedmon is a good choice as it allows you to gain 1 memory when you Digi-Burst it out from Grankuwagamon's skill. The 1 memory can then be used to digivolve to GrandisKuwagamon too. Other good Lv4 choices will be those which cost 1 to Digivolve, as you do not want to waste memory on Lv2 to Lv5.
 
 
For Lv5, Argomon (BT2-047) and Blossomon (BT3-054) are good choices for their free Digivolution cost with Digisorption. Okuwamon X Anti-body (BT9-052) is decent as well as it reduces the Lv6 digivolution cost by 1. If you are using Okuwamon X Anti-body, then you might consider putting Okuwamon (P-075) as well due to their synergy.

Here is a sample deck list:
 
Mimi is the best tamer choice as it allows you to 'superior hatch' when you have a Lv5 or higher green Digimon in play. The other green options are just fillers which help this deck a bit. Green Memory Boost is always nice with the top 4 search and <Delay +2 Memory>. Green Plug-In is a more interesting choice as it allows you to digivolve to Grankuwagamon for a cost of 2 while giving you a bonus draw. Its security effect allows you to search top 3 for a Digimon too. Grandis Scissor is there for you to kill opposing Digimon when you cannot win the game in one turn, and its security effect of suspending 1 might save you.
 
In conclusion, this deck is fast and efficient with no real counters, except for opponent's security lucksack. It is hard to stop this deck as the Digimon can just hide in nursery until it reaches Lv6. The only weakness is that it must draw at least 1 of each Lv3 to Lv5 cards, plus Grankuwagamon and Grandis. If you manage to draw them, you probably will win fast. If not, you might lose before actually doing anything, since there is no OTK.
This marks the end of this post, enjoy the long weekend!

Wednesday, 2 February 2022

[V-PREMIUM] UPDATED Luard Deck Profile - Defensive Strategy

Hi everyone, and welcome back to another article on V-Premium Luard. Owing to the recent BRO 2021 tournament, I would like to pen down a defensive strategy of playing the deck which is more effective in the current metagame environment.

First, a quick look at the decklist (do compare with the previous decklist on the old article as well Weakness Is A Sin: [V-PREMIUM] Luard Deck Profile and Strategy (weakness-is-a-sin.blogspot.com):

  • Triggers: 20k-shield heal triggers are run in this deck instead of heal guardians due to the increased defensive utility of 20k-shield cards in a deck with lower-than-usual numbers of 5k-shield cards (aka grade 2s). Furthermore, they tie in very well with the 10k-shield intercepts provided by Sage of Risk, Decremps to assert a 30k-guard in total.
    • In terms of the early-game defensive purposes of heal guardians, hardcore rush decks are also rarely seen in the top tier meta due to their typical low levels of consistency, which further diminishes the usefulness of heal guardians.
    • It is also not crucial to use the damage-giving ability of heal guardians as Dragheart, Luard's Force marker-generating engine does not require counterblast, and opponents often suffer more when they damage deny a Luard player to zero damage, since Luard is by nature a slow deck.
  • No multi-attack generating grade 1s: Abyss Router and Apocalypse Bat are not seen in this decklist as the focus is no longer on attack count, but rather on defensive recovery and power output. The usage of Abyss Router or Apocalypse Bat frequently results in minuses in terms of shield power, hand size, or hand quality, assuming their inconsistent requirements are even met in the first place.
  • Increased number of Abyssal Owl: for more card draws. Increased filtering power greatly enhances the probability of having multiple Perfect Guards in hand to survive the opponent's onslaught.
  • Increased number of Strict Order Knight, Lluails: for higher power output, without sacrificing potential defensive advantage
Now, let's go over some of the strategic updates for this deck, using the above decklist.

No More Damage-Denying

In the previous article, it was mentioned that if a Luard player goes second, he should completely damage-deny (aka give zero damage to) his opponent in order to increase the chances of survival to reach the insane second grade 3 turn. However, this strategy is now increasingly ineffective due to the ability of heal guardians to provide the first damage. Pushing for damage aggressively in the early game could instead enhance the lethality of your subsequent grade 3 turns, while not losing out on your potential early game drive checks.

First Grade 3 Turn

Your goal for this turn is to set up Sage of Risk, Decremps on the field, while maintaining one open counterblast for next turn as well as drawing cards wherever able. The two 10k-intercepts enabled by Sage of Risk, Decremps should be fully utilised every turn in order to maximise the free 20k-shield defense for each turn. It remains extremely crucial to maintain one open counterblast (by counter-charging with Black Sage, Charon whenever necessary) as Dragdriver, Luard does require one open counterblast to generate massive field advantage for your subsequent grade 3 turns.

The most defensive first grade 3 turn field you could end up on, with two card draws and two 10k-shield intercepts for next turn. Attack order would be 15k RG, followed by 28k VG, followed by 23k RG to ensure that attacks still hit after one damage trigger or one heal guardian was used by your opponent.

The minimal field that you could end up on if you only have one damage. Although there are no card draws, Charon allows you to regenerate the only open damage that you have, while still providing the two 10k-shield intercepts for next turn. Attack order would be 18k RG, followed by 23k VG, followed by 21k RG to ensure that attacks still hit after one damage trigger or one heal guardian was used by your opponent.

Subsequent Grade 3 Turns

Your goal for these turns is to push damage with high-power high-crit attacks, while gaining and not compromising on defensive advantage. This can be done by utilising Lluails and Abyssal Owl, either from the deck, hand, or drop zone in conjunction with Dragwizard, Morfessa's effect. Importantly, at the end of the attack pattern, you still have two 10k-shield intercepts in the front row for surviving the opponent's offensive push.

You may begin your battle phase with this field, having already regenerated the counterblast and soul from Charon's and Nightmare Painter's effects during the main phase. Attack order would be 40k 2 crit Morfessa unboosted, and activate the effect to call Abyssal Owl from the drop zone, soulblasting 1 to draw 1 card. This is followed by Lluails boosted with 40k 2 crit, then the 46k VG, and finally the Abyssal Owl boosted lane with 46k 2 crit before triggers.

You will then end your turn with this formation, fulfilling the two key conditions of (1) having at least one open counterblast and (2) having two 10k-shield intercepts in the front row. Drawing cards from Abyssal Owl is of course an absolute defensive bonus.

Conclusion

This short update article highlights the importance of increasing shield power and deck filtering speed, while not compromising on offensive output in today's V-Premium metagame environment. Similar capabilities are exemplified in other tier 1 meta decks such as Bermuda Triangle Prism and Granblue Nightrose. It is my hope that with the upcoming V-Clan Collection support waves, more decks will be able to approach these power levels for a more interesting and balanced format overall.

Friday, 31 December 2021

[DIGIMON] Reaper Deck Review

Hi everyone, this shall be the first post on Digimon here! As mentioned in the title, this post is about the hyped D-Reaper deck which received all its support in the release of EX-02. There are already quite a lot of YouTube videos on this type of deck, and it actually appears to be strong (if not imba).

Key cards

We will look at the key cards of this deck and understand why it can be so strong and scary.

First up is Mother D-Reaper (EX2-007, Digitama). Without this card, this deck cannot function at all. 


First skill (translated): [All Turns] This Digimon can't attack and isn't affected by your opponent's effects.

Basic but very strong effect as it cannot be affected by opponent's card effects. This makes it very difficult for opponent to remove this card on the field. It cannot attack at all, but other reapers can do the job easily.

Second skill (translated): [Main] [Once Per Turn] If you don't have another [Mother D-Reaper] in play, place 1 of your [ADR-02 Searcher]s from in play or your hand under this Digimon as its bottom digivolution card.

Another nice skill. The player will only have 1 Mother D-Reaper on the field anyway, unless he/she is trolling and hatch more than 1 of them... This skill means it can put 1 ADR-02 Searcher card under its digivolution source once per turn. We will look at that ADR-02 Searcher card later.

Third skill (translated): [Your Turn] [Once Per Turn] When you would play a card with [D-Reaper] in its traits from your hand, you may reduce its play cost by 1 for each of this Digimon's digivolution cards.

This effect means other D-Reaper cards will be much cheaper to play, although it is only once per turn. It is a strong effect once you see what the other D-Reapers can do... The magic numbers for digivolution cards are 6 and 7.


Second, we will look at ADR-02 Searcher (EX2-046, Digimon) which forms the core of this deck. This card will get stacked under Mother D-Reaper, and remember that we want to have at least 6 or 7 of them.


Card Effects (translated):

You can include up to 50 copies of cards with this card's card number in your deck.
When you don't have another [ADR-02 Searcher] in play, if you play this card from your hand, reduce its play cost by 2.

[Your Turn This Digimon can't attack players.
[Your Turn <Draw 1> (Draw 1 card from your deck).

Inherited Effects (translated):

[Your Turn] All of your Digimon with [D-Reaper] in their traits get +1000 DP.

Since we can include up to 50 copies of this (instead of the usual 4), most players will run about 15-20 of them in the deck. It costs 1 to play if you do not have another ADR-02 Searcher on the field, and then you draw 1. This effectively replace the digivolve draw bonus in other decks. 

Furthermore, the inherited effect gives all [D-Reaper] +1000 DP during your turn. This means your D-Reaper cards can potentially have insane DP during your turn!


Next, we will look at 2 cards which help to speed up the process of stacking ADR-02 Searcher under Mother D-Reaper. They are ADR-01 Jeri (EX2-049, Digimon) and ADR-04 Bubbles (EX2-048, Digimon).


On the left, ADR-01 Jeri allows you to suspend it to reveal top 5 cards of your deck, then put 1 ADR-02 Searcher from among them under Mother D-Reaper. This skill bypasses the "summoning sickness" and it can be used on the same turn it is played.

On the right, ADR-04 Bubbles has 2 effects which do the same thing. One activates when you check it in security, and the other one activates when you play it. It allows you to place 1 ADR-02 Searcher from your field or hand under Mother D-Reaper.


So, after stacking so many ADR-02 Searcher under Mother D-Reaper, we need a way to win the game. Here comes the finisher card, Reaper (EX2-055, Digimon).

Card Effects (translated): 

When you would play this Digimon, you may trash 7 or more digivolution cards from the bottom of 1 of your [Mother D-Reaper]'s to reduce this Digimon's play cost to 0.
<Rush> (This Digimon can attack the turn it comes into play)
[Your Turn]You may place 2 [ADR-02 Searcher]s from your trash under this Digimon in any order as its digivolution cards to unsuspend this Digimon.

When you finally have 7 or more ADR-02 Searcher under Mother D-Reaper, you can play this card for no cost (free!) by trashing 7 or more digivolution cards from Mother D-Reaper. The digivolution cards are synonymous with ADR-02 Searcher in this case as there should be no other cards under Mother D-Reaper.

It should be the endgame once you play this card. It has <Rush> so it can attack immediately after play, and its other skill allows it to unsuspend multiple times. Your opponent will be hoping for some good security checks once they see this card. There are some security checks which can stop this card (1 easy example is Gaia Force). But if luck is on your side, you can just attack with this card until you win.

Utility cards

We will now look at some utility D-Reaper cards which complete this deck.


On the left, we have ADR-03 Pendulum Feet (EX2-047, Digimon) which has an on play effect. It allows you to check top 3 of deck and take 1 ADR-02 Searcher and 1 card with D-Reaper in its traits. This also means you can take 2 ADR-02 Searcher if you are ever short of them.

On the right, we have the destroyer ADR-07 Palates Head (EX2-051, Digimon). You can suspend it to delete 1 of your opponent's Digimon with less than or equal to this Digimon's DP. If you still remember ADR-02 Searcher's [Inherited Skill], all D-Reaper +1000 DP during your turn for each ADR-02 Searcher under Mother D-Reaper. This card can easily snipe opposing 10k+ DP Digimon when you have 7 or more ADR-02 Searcher under Mother D-Reaper... And similar to ADR-01 Jeri, you can use this effect on the same turn it is played. Sounds balanced?

We will look at 2 more D-Reapers which have higher play costs and good effects.


ADR-09 Gatekeeper (EX2-054, Digimon), on the left, is the defender of this deck. Its first skill allows you to play it for free from security check (without battling though). Second skill allows you to Recover 1 Security when you have a Mother D-Reaper on field. Its third skill is definitely the most pesky one; all opposing Digimon gets [Security Check -1] when your Mother D-Reaper has 6 or more digivolution sources. Your opponent will need to get rid of this card before even attacking your security, or negate this effect by having [Security Check + x]... Otherwise you can just stall the game for as long as you like. 

ADR-08 Optimizer (EX2-053, Digimon), on the right, is considered a luxury for this deck. Its effect is not required for you to win the game, but it is still nice to have. Its only effect activates either on play or when attacking [Once per turn] if your Mother D-Reaper has 5 or more digivolution sources. It allows you to check top 3 card of deck, and play 1 cost 10 or less D-Reaper card from among them. Put the remaining cards back on top of deck. If you noticed, the play cost of this card is 10, so you can actually play this card again from the top 3 cards and then repeat the effect... Other good choices include ADR-01 Jeri and ADR-07 Palates Head. This card just ramps up your field as a bonus and maybe for flexing.

We have covered almost all of the D-Reaper cards now. Only ADR-05 and ADR-06 are missing here but their effects are pretty basic so I will skip them.


Decklists and Strategies

Let's look at a typical decklist for D-Reaper.

The above deck consists of D-Reaper cards only, and it is still a very decent deck. The key cards are at 4 copies each, with 20 ADR-02 Searcher. 
 
When playing a D-Reaper deck, it is actually advantageous to go first. If you go first, it means you get to hatch your Mother D-Reaper before your opponent attacks. This maximizes the potential security effects of ADR-04 Bubbles and ADR-09 Gatekeeper. Also, you can memory choke your opponent just by playing a ADR-02 Searcher, passing only 1 memory to your opponent. 

Every turn, you would want to play at least 1 ADR-02 Searcher to draw 1 and cycle through your deck. Then, Mother D-Reaper will activate its skill to suck 1 ADR-02 Searcher under itself. Finally, you will normally end the turn by playing 1 more D-Reaper card, which has its play cost reduced due to Mother D-Reaper's effect.

With the help of ADR-01 Jeri and ADR-04 Bubbles, you will probably reach 6-7 digivolution sources in less than 6 turns. So your aim is just to survive until then. Against a non-rush deck, this should be achievable as your opponent also needs time to setup their own field. However, a rush deck could cause problems as it could deplete your security before you even reach 4 digivolution sources? Thus, there are 3 blockers in the form of ADR-05 Creep Hands which would help to stall a bit. It might not be enough against rush decks, but at least there is an attempt to slow the game down. And if you managed to survive the initial rush and reach 6 digivolution sources, ADR-09 Gatekeeper will defend easily for the rest of the game.
 
There is also another way to slow the game down by using Yellow cards. Let's take a look at this sample decklist.
 
 
The D-Reaper core cards remain, but with less ADR-02 Searcher and some Yellow cards now.
There are 2 kinds of Yellow Options here. First is Tactical Retreat! (BT4-105), which triggers <Recovery+1> from security, effectively nullifying 1 damage. It also allows you to place 1 Digimon from field on top of your Security stack. You can use this option to place ADR-09 Gatekeeper or ADR-04 Bubbles on top of Security to make use of their Security effects. Second is Reinforcing Memory Boost! (BT6-100), which lets you check top 2 from deck, and put 1 on top of Security and 1 to hand. It also has the effect <Delay: Gain 3 Memory> which helps when you are short of memory.
 
To play Yellow option cards from hand, you need either a Yellow Tamer or Digimon already on the field. Obviously we have no space for more Digimon, so we introduce 2 different Yellow Tamers here. First is T.K. Takaishi & Kari Kamiya (BT6-089), which gains you 2 memory when you have less security cards than your opponent. Next is Kari Kamiya (BT8-090), which sets your memory to 3 and you can suspend it to gain 1 memory when a card is added to your security stack during your turn.
 
The <Recovery> effects of the Option cards can hopefully help to stall the game for you to reach 6 digivolution sources. The Tamers provide more memory for you to work with, so you can play more cards and try to reach 6 digivolution sources in fewer turns.
 
We know much more about D-Reaper decks now. It is time to see the weaknesses of Reapers.

Weaknesses
  1. Rush decks - As mentioned earlier, rush decks can win the game before Mother D-Reaper reaches 6 or more digivoluton sources. The Yellow cards help but you might not always have them. Lv3/Lv4 rush is still more consistent than you drawing yellow cards and checking good securities.
  2. Mother D-Reaper can be destroyed - This can only be exploited by some specific cards, but it is still considered a weakness. 1 notable mention is Judgement of the Blade (BT6-093), which allows [Royal Knight] to attack unsuspended Digimon.They still need to hit 15K DP however, but Jesmon and Gallantmon should have no problem hitting it. MetalGreymon (BT8-067) inherited effect also allows [Dragonkin] or [Machine] to attack unsuspended Digimon, so this is another method. Once Mother D-Reaper is destroyed, all the digivolution sources go to the trash and you have to start all over again. It basically means you lost the game.
  3. Security checks - Reaper is not immune to security effects, so if it get disrupted by any Security effects halfway, it cannot continue to attack and you cannot win the game. Once you play Reaper, you have already trashed 7 digivoluton sources under Mother D-Reaper, and ADR-09 Gatekeeper cannot help to defend anymore. There is possibly a way around this, which is to stall until you have 14 digivolution sources. This give you 2 chances for Reaper to win the game. Just be prepared to play a long game...
  4. Hexeblaumon (BT5-032) 😂 - Digimon with no digivolution cards can't attack or block when your opponent has a Hexeblaumon in play. Since all D-Reapers (except Mother) have no digivolution cards, they cannot attack at all. You can get around this with ADR-07 Palates Head's effect (need 8 digivolution sources to hit 11K DP though).

Conclusion

D-Reaper deck comprises of just CUR cards but it is still a strong deck. It has some weaknesses but it should perform quite well against most decks. It is also consistent with ADR-02 Searcher helping to draw cards for just 1 cost, and you are able to memory choke opponents if they do not have set to 3 memory Tamers. All D-Reapers card do not have Level, so it is immune to all effects that target Level as well. I guess this deck will be popular for quite some time while it is still strong. Hopefully this deck will not dominate the meta and we can still see more traditional decks (involving actual Digivolution) in play. 

Enjoy the game and Happy New Year everyone!


Saturday, 18 December 2021

[V-PREMIUM] BRO 2021 AO Region - BERMUDA TRIANGLE (PRISM VERT)


And so the Bermuda Traingle player shall briefly comment on his tournemant experience. It was my second Cardfight Vanguard Tournemant and it was quite a while since the previous one where I just used a modified trial deck. I chose this deck as it was decently strong and also easier to pilot compared to my other decks. As shown by the decklist, it is a rather offensive built compared to other similar builts of the same archetype.


Well lets get into the tournemant results.


Round 1: VS Gold Paladin (SDD) - lose

I went first but could not finish the opponent off and lost due to too many attacks.Maybe I was abit nervous and made a few misplays.


Round 2: VS Megacolony - win

G-assisted to ride the grade 3 Vert. Opponent tried to stun my rear guards but easily countered with Aqua's abilityto return the stunned unit on field back to hand.


Round 3: VS Shadow Paladin (Claret Sword) - win

Heal guardian was clutch this round as opponent tried to rush using Force 2 while my vanguard was still on grade 2.


Round 4: VS Gold Paladin (SDD) - win

Probably the longest game as opponent checked quite a number of damage triggers and was able to survive a few turns. Luckily I managed to shut down the multiple attacks with a damage trigger.

Round 5: VS Bermuda Triangle (PRISM) - lose
Mirror matchup, opponent went first and used cutire prism built while I had zero heal guardians. Hence Go First Win Game.


Round 6: VS Murakumo (Yasuie) - win
Went first and drive checked double critical trigger on my first grade 3 turn while opponent's vanguard was still on grade 2. Go First Win Game.

Round 7: VS Genesis (Valkyrion) - win
Close match as opponent tried to rush me using restanding Valkyrion while my vanguard was still on grade 2. Luckily I had heal guardians to defend against opponent's early rush.

Round 8: VS Granblue (Beatrice) - lose
Went second, opponent managed to pull off multiple attacks as I did not check any damage trigger. 

Overall result: LWWWLWWL (5 wins, 3 losses) 

Overal  I feel abit disappointed to not get at least 6 wins. However I am glad that my first online tournament proceeded smoothly without any disconnection issues. To conclude, the tournament has really shown that heal guardians have really changed the v-premium format and give the player going second a much higher chance of being able to survive until the latter stages of a match and even win.


Sunday, 12 December 2021

[V-PREMIUM] BRO 2021 AO Region - ROYAL PALADIN THING SAVER DRAGON

 Hi, I'll be giving my report for BRO 2021 AO region. 

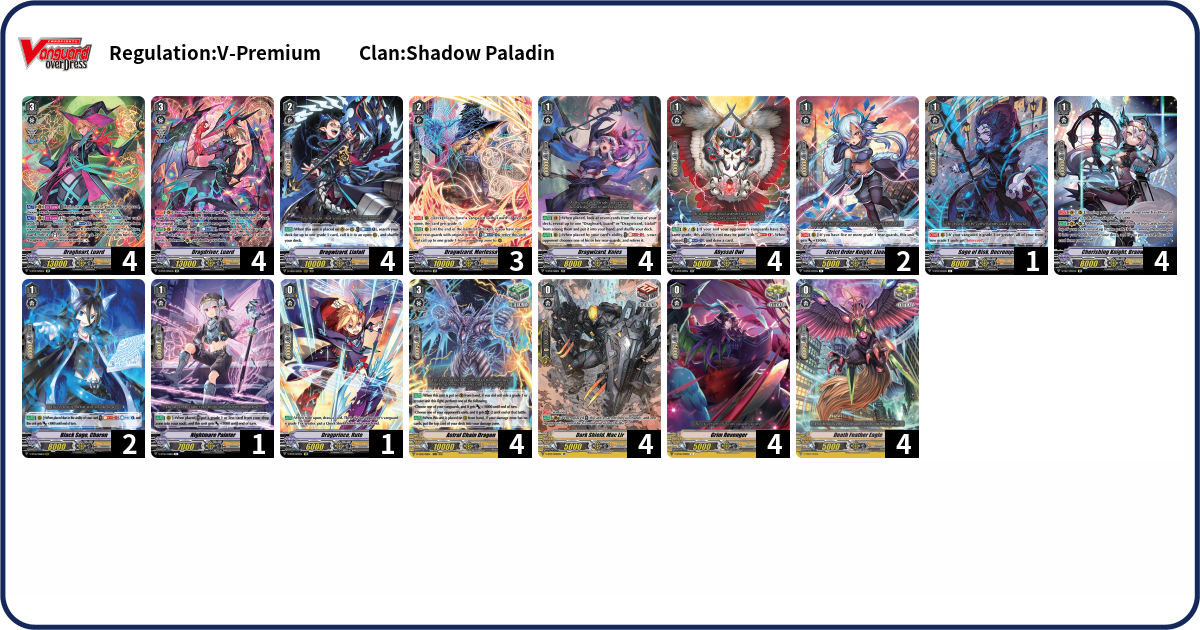
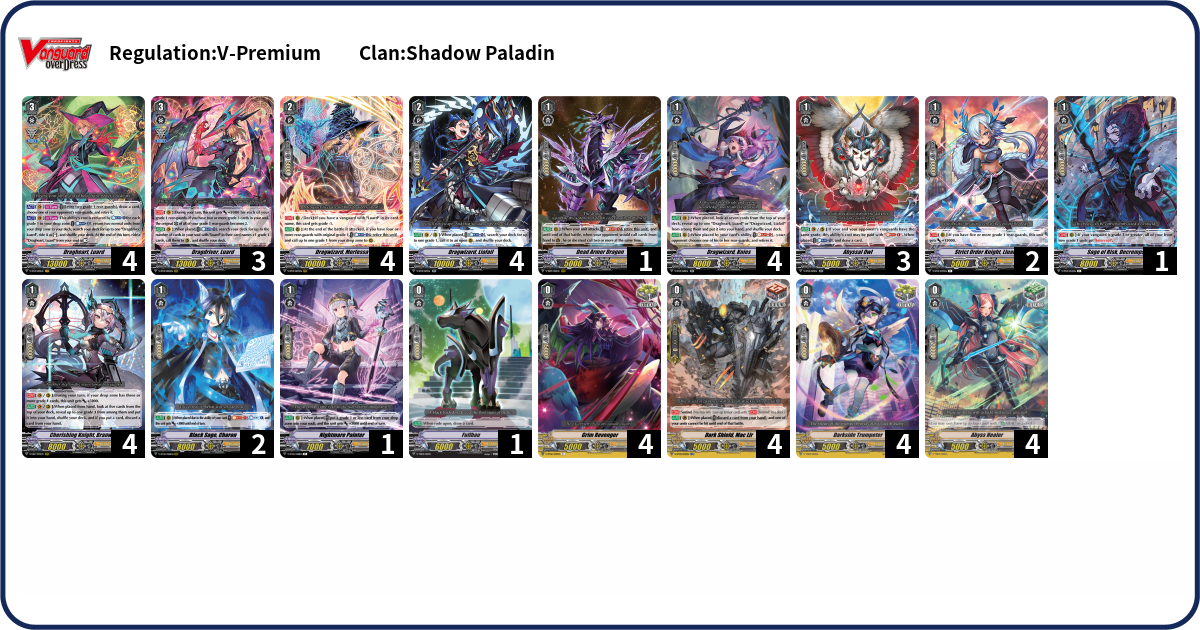
Lets talk about my deck first and a small writeup about it. Here's the decklog link : Thing Saver Deck Log


I think most people would spot the lack of Ashlei in the decklist. Personally in my own playtest vs other people. I end up almost never using Ashlei's effect due to the soul cost. As such, I have cut it from the deck and replaced it with Livarots instead (Since I had some extras) The game that made me decide to cut Ashlei was one that I drew Ashlei on my g3 turn, was unable to G-Assist and was forced to ride Ashlei, TSD (Thing Saver Dragon) being a 1-turn delay deck, already suffers from its own limitation, failriding ends up making the game straight up unplayable. G-assisting is preferable. During the games, I found myself not really using Livarot much either, so will probably change it to 1 more loading angel and a random g1. The deck is really slow paced, and kinda grindy with the legion playstyle of shuffling 3-4 triggers back each turn (2nd G3 turn onwards). I also use the jewel knight g1 and g2 to constantly put Blaster Blade Seeker (assuming I could not proc its effect) as well as TSD back into the deck, which allows me to put 4 triggers back every turn with TSD. Lucius, Loading Angel and the Jewel Knights allow me to consistently have the soul count required to activate TSD skill each turn. Also, note that going first is extremely good for this deck due to the 1 turn delay and I will constantly mention this in the following recaps.


Lets move on to the games that I played.

Round 1  vs Dimension Police (Bradblack) - Win
Fighting against DP, I actually lost the dice roll and went second. I honestly expected to lose against DP due to its early aggression and high crit count. Actually managed to barely win, on my opponents 2nd g3 turn. He had two miracle beauty's on the board, and bradblack actually found Great Daiyusha. This meant that I had to deal with four 33k + Boost and 2 Base critical Miracle Beauty rearguard attacks. Luckily the first two damage I took gave me 2 Damage triggers, allowing me to barely guard all the attacks by dropping my whole hand. I then proceeded to win the game on my turn with TSD's 2nd Turn.

Round 2  vs Gold Paladins (SDD) - Win
Once again, fighting another super aggressive deck and losing the dice roll, I expected to lose. To my surprise, my opponent actually commented that he has a horrible history vs TSD using SDD. Either way, he fail-ride not Vortimer on turn 2. Combined with the fact that he did not have 4 damage on his first SDD turn, meant that he was unable to build up his handsize too greatly. Following this turn, he actually got a 2nd SDD turn where I no Guarded his SDD's 2nd attack at 3 damage, he failed to check a trigger, allowing me to survive barely at 5 damage. I would also note that he was not able to use percival's effect a single time in the first two SDD turns. He successfully defends against my turn, but was left with 2 cards in hand, unable to restand SDD he pretty much put up a weak attempt at closing out the game and fails, I proceed to win on my following turn, he had 3 cards in hand.

Round 3 vs Narukami (Vanquisher) - Lose
Again, I lose the dice roll and go second. However my luck has finally ran out, with no heal guardians or damage triggers, I end up dropping my whole hand on his first G3 turn (while I was on G2) to barely survive at 5 damage. I had been guarding early, so I actually went from 0-5 damage in  a single turn, only getting a damage trigger on the last check (and my opponents last attack). Getting full-brontoed while being a g2 is rough. Nothing interesting happens on my first TSD turn, then I lose the following turn.

Round 4 vs Bermuda Triangle (Highlander) - Win
To clarify, this is a pure Highlander build, not the new PRISM - highlander hybrid thing going around.Finally, I win the dice roll and go first. Very uneventful game as my opponent G-assists on G2, and I get 2 triggers on my first TSD turn. He gets a 6 damage heal, barely surviving my turn. On his turn, he attempts to damage deny me, attacking my rearguards with his rearguard and vanguard, but ends up using raindeer, riding ange and giving me one damage. I win the following turn due him not having a decent hand. Interestingly, this opponent actually had 5 PGs in his decklog (which I and his first 2 opponents did not notice) and was actually DQed on the 5th round

Round 5 vs Dark Irregulars (Scharhrot) - Lose
Going into this game, I felt pretty confident I could out grind a Scharhrot player.  I was wrong. I also lost the dice roll, and went second. He managed to ride g3 searcher to discard a card, calls out variants killertail and immediately was able to use her effect. Following this, he managed to ride emblem master on g2 turn, placing 3 variants killertail from the deck into the soul and continue to build up huge soul count. On his first g3 turn, he almost managed to hit 15 soul, if I recall correctly, he was at 12 soul when Schahrot attacked. Side note, he had a Number of terror, which he restanded allowing him to gain a huge handsize advantage. Overall he out-grinded me and eventually closed out the game.

Round 6 vs Granblue (Nightrose) - Lose
I won the dice roll, felt decently confident in my chances. Nothing particularly interesting to talk about for this game, just did regular granblue things. He managed to get beatrice as a rearguard and two ghostships by the first g3 turn, so every turn he was able to get at least 3, if not 4 ghostship attacks, that allowed him to survive my attacks (combined with protect 1 markers) Eventually, he closed out the game with a 25 cards in his drop and quadruple skull dragons. 

Round 7 vs Royal Paladin (TSD) - Win
Actually my favourite match of the entire day, the two of us just had a great time talking and playing TSD. Won the dice roll, so went first, putting me at an advantage. This was also the longest game I played, actually going all the way till timeout and a judge actually informed us that its the last three turns. That said, I managed to win that turn. Overall, I think I won due to force gift placements. I focused most of my gifts on the vanguard, while my opponent split the power evenly. This led to me constantly having 2 high power columns (both my vanguard attacks, as well as the blaster blade seeker attack) which were very hard to guard after the 2nd TSD turn. While his evenly spread gifts allowed me to guard most of his attacks much more easily. Also go first win game lol.

Round 8 vs Genesis (Regalia) - Lose (but in my heart I won)
To clarify, this was a pure regalia build, not Himiko regalia. Losing the dice roll, I expected to get rushed down. However managed to get 2 heal guardians in my hand, allowing me to negate his first g3 turn. Eventually, on his 3rd G3 Turn, he declared his last attack, I had a PG in hand, so I could guard it. BUT at that moment my computer actually crashed, like a blue screen. Seeing as I was going out after the match, I honestly got too lazy to turn on my computer again so I told my opponent as well as the judges that I crashed, but was unable to guard and so awarded my opponent the win. Realistically, if I did reconnect, I would most likely have won the game as he was at 4 damage with 5 cards in hand. It would be my 3rd TSD turn and my first twin drive actually was two triggers. (I just simulated it because I was curious) Thus, in my heart I would have won the game. In reality though, still a loss.

Overall Results WWLWLLWL 4wins, 4 losses
In my heart WWLWLLWW 5wins, 3 losses
Personally, I actually went even in wins/loss. Ranked 42 overall. I expected much worse results (you can tell based on my deck name)playing TSD. Especially going into a meta that seemed like would be a counter to my slow paced deck. Turns out most of my matches was decent matchups and I was able to enjoy myself vs other players that were less competitive and more there for fun. Managed to avoid all the meta decks somehow (except maybe granblue)

Thats all from me, looking forward to the next clan collection, where we will be getting Salome for jewel knights!

Saturday, 11 December 2021

[V-PREMIUM] BRO 2021 AO Region - Shadow Paladin Luard

Now the edgy Shadow Paladin player will give his report for BRO 2021 V-Premium AO Region tournament.

First, the deck list used. It's the same list as the one posted in my previous post (Weakness Is A Sin: [V-PREMIUM] Luard Deck Profile and Strategy (weakness-is-a-sin.blogspot.com)), but just with heal guardians.

For more details on the strategies that I applied for this tournament with the deck, check out the link above for the comprehensive blog post. I followed all the tactics in that article (since I wrote it myself, heh).

Now, let's have a breakdown of the games.

Round 1: vs Gold Paladin (SDD) - win
Before this tournament, I was deciding what deck to use, between Luard or SDD. It turned out that my Luard deck was twice as consistent as my SDD deck (out of 20 simulated games), so I chose the more consistent deck to use. Turns out that this becomes exemplified right in round 1, where my SDD opponent misgraded grade 3 for 1 turn (either didn't have grade 3s, or had grade 3s other than SDD). Since SDD relies so heavily on riding SDD on top of grade 2 vortimer to get the advantage engine started, I can totally imagine why a SDD player would refuse to ride and wait for SDD instead. In any case, I was on the way to victory since I damage controlled him to 3 damage (prevent his triple drive after restand), and I had 2 kanzen guards in hand to guard for his next turn. However, the game ended abruptly as he had to handle his wife and child(?) quarrelling loudly in the background, so he surrendered the game during one of my turns. OOPS 😂

Round 2: vs Royal Paladin (SGD-JK) - win
I went first, G-assisted for grade 3 Luard, and proceeded to activate Luard's field control protocols. Thus, he was unable to obtain 3 grade 1 rear guards for his first SGD turn, and could not even activate SGD's restand effect. My victory was assured after that.

Round 3: vs Link Joker (Messiah) - win
I got a shock when I saw his clan, as I would have been in serious trouble if I were to face off against Chaos Breaker Dragon. Fortunately, it was a Messiah deck which does not lock my field and prevent the Morfessa tactics, so after some trouble (he drive checked 3 heals), I still managed to win. LOL

Round 4: vs Genesis (Himiko-Yggdrasil) - win
He GG-assisted grade 1, and I went first some more. Nuff said, he lost when his vanguard was still at grade 2. 😂😂😂 So weak? Well, welcome to Vanguard HAHAHA

Round 5: vs Bermuda Triangle (Prism) - lose
Time for some real opponents. Quite impossible to outlast the crazy Cutire combos (might be featured in our future blog post). I went second, activated damage control protocols and kept him at 0 damage, but he circumvented that by riding Lupina first to build Force I gifts on his field.

Round 6: vs Bermuda Triangle (Prism) - lose
This opponent was even more ridiculous. He showed me the power of Cutire-Aqua-Elly loops, keeping his hand size at 14-16 every turn even after my Luard offensive turns. Doesn't deck out also due to Elly's return to deck skill and a few other return to deck effects. Depressed already at this stage 😔

Round 7: vs Gear Chronicle (Chronojet) - win
My longest game of the day. In fact I'm quite sure that my table was the last to finish for this round oops. My opponent kanzen me 4 times, but I eventually outlasted him when he drive checked 2 grade 3s and I had 4 cards left in deck, all of which were triggers. Tiring though.

Round 8: vs Bermuda Triangle (Prism) - win
This Prism deck didn't have Cutire. Maybe that's why I could win. Or maybe it's because I went first LOL

Overall results: WWWWLLWW (#19 place)

So in the end, I was 11 places away from top 8, but still, no ragrets as I only lost against crazy BMT Prism meta decks. I'm sure I wouldn't have done better if I had used SDD instead, and indeed the top 8 results of this tournament reflected this theory, with 2 Luards topping and 0 SDDs. Let's now look at the decklists for the 2 Luards which topped.


Interestingly, both decklists did not feature any 5th-attack generator (i.e. Abyss Router or Apocalypse Bat). This leads me to think that an extremely defensive strategy was being employed by these 2 players. This is further corroborated by the presence of 3-4 copies of Abyssal Owls in their decklists, whereas my decklist only featured 2 copies. In addition, one of them did not even run heal guardians, so I'm not entirely sure where this is going. I guess we'll have to see their performance in the Top 8 playoffs tomorrow.

So that's it from me today, and I think it was a pretty good tournament run for me, with lots to learn. Now, back to my fun V Clan Collection decks... 😝

[V-PREMIUM] BRO 2021 AO Region - Murakumo Yasuie

Hello everyone, I am colddy and this is my first post here.

This post is about BRO (Bushiroad Rumble Online) 2021 and my first experience in this tournament. To be honest, I am more of a Digimon TCG player than a Vanguard player, but I decided to enter BRO 2021 together with my friends anyway because why not?

So, I entered the BRO 2021 (V-Premium format) and I only have 1 proper V-Premium deck (Murakumo - Yasuie). LOL. This deck is not supposed to be strong or even close to making the top 8 cut, and that means I went into this tournament with a "play for fun" mentality. And I was right after 3 games! (3 losses out of 3 😂). After that, I just continued to play for fun and managed to get 4 wins in the end, including 1 walkover 😶. My final ranking is #52 (4W, 4L). Not too bad, I guess?

My decklog: https://decklog-en.bushiroad.com/view/KFNE


Here are some of my comments on BRO2021:

  • Flow of tournament: The flow of tournament was actually quite smooth, averaging about 1hr per round. It started at 10AM (need to check-in at 9AM first) and ended before 6PM. I would say it was smoother than I expected.
  • Opponents: All the opponents I faced were quite friendly, with no disputes or any trouble. The deck profiles are quite varied too (maybe because I was already in the losers' bracket). I think I faced a different clan in each round.
  • Matches: The games are played online using cameras, and it could be quite troublesome to setup. Also, some of the opponents' camera angle/quality are not the best. Despite this, I think the game is still playable overall, though I will 100% prefer a real life tournament like back in 2019.

Also, after the tournament, I realized one of the top 8 decks is actually Murakumo-Yasuie. LOL. I guess it is time for me to study that deck now? 

This marks the end of my first post. My next post might be about Digimon TCG (which is not featured in this blog yet). See you guys and enjoy the rest of 2021!


Saturday, 2 October 2021

[V-PREMIUM] Luard Deck Profile and Strategy

Hi everyone, and welcome to this comprehensive article about the Shadow Paladin Luard V-Premium Deck. The article addresses the deck's gameplay and profile in the current English format, and the decklist is shown towards the end of the article. Enjoy!

Slow deck

The first thing that you would want to know about Luard in V-Premium is that it is a relatively slow deck; it requires some time in order to scale up to its full potential. This can be seen from the card effects of the key grade 3, Dragdriver Luard.


You can see that the primary offensive capabilities of this deck only kick in when you have two or more grade 3 cards in your soul, which is only possible from your second grade 3 turn onwards (this has been the case ever since the Bendi-Luard choice restrict). The second superior call skill also kicks into full gear only when you have multiple Luards in soul. Due to these reasons, it is imperative to stall the game until you reach your second grade 3 turn and beyond, ESPECIALLY if you're going second and have to survive two opponent grade 3 turns before reaching that stage.

Early game

The strategy of the early game depends on who goes first. Owing to the huge advantage that many V-Premium decks can obtain by riding grade 3 before the opponent does, coupled with the fact that Luard is a slow deck, a certain level of damage deny and game pace control is necessary, especially when the Luard player goes second.

If you go first: Go ahead to ride up and attack normally. With just one open damage and two soul, you can utilise 2 Liafails to superior call 2 Charons, and use their skills to regenerate the counterblast. This is extremely powerful to elicit early field plusses as well as high power lanes in early game without requiring too much resource consumption.


If you go second: You may need to completely damage deny your opponent, especially if your opponent is playing a fast rush deck with an explosive first grade 3 turn that has OTK potential. It is possible to do so while still not sacrificing your early vanguard attacks and resultant drive checks, and one way to do this is to ride one of your 5k power grade 1s. Assuming that your opponent has a grade 1 vanguard that is above 5k power (almost guaranteed to happen unless in a Luard mirror match), you can then call another rear-guard to your back row, and attack with your 5k power vanguard while unboosted. If you drive check a trigger, you can give the trigger power +10k to your back row rear guard instead, in order to ensure that the attack still does not hit and the opponent does not get access to counterblast. 


During your grade 2 turn, you can attack your opponent's rear guard with your vanguard, or not attack at all if your opponent did not call any front row rear guards. You may start to attack normally once you hit your first grade 3 turn, as you would already have likely dampened the potential of your opponent's first grade 3 turn significantly and stalled the game.

General strategy

Your first grade 3 turn is generally considered to be a farming turn; you are farming grade 3 Luards in soul as well as Force I imaginary gifts in order to set up for your second grade 3 turn and beyond. As such, the offensive capability of this turn is understandably low, and focus is placed on obtaining advantage while still reserving sufficient resources for your late game.

If you have very little counterblast available: You may want to consider superior calling Charon and Nightmare Painter with your two superior calls from Dragdriver Luard. This will help to replenish the counterblast that was just consumed by Dragdriver Luard's skill, while not compromising on soul count for subsequent turns. This would be a purely resource-free move that just adds cards to your field.

If your opponent rushed you hard and you're currently hanging on for dear life: You can superior call out two Abyssal Owls using Dragdriver Luard's skill, and then utilise the plenty of counterblast that you now have in order to draw cards and replenish your hand. The most defensive move possible would be to call two Abyssal Owls as well as Decremps, so that you draw two cards, plus two rear guards, and gain two 10000 shield intercepts to defend for the next turn due to Decremps' skill. Note that you have to call one of them from your hand as you only get two superior calls on your first grade 3 turn.


On your second grade 3 turn and beyond, this is when your offensive capabilities actually start to go nuts. If you've reached this point of the game without losing, congratulations and it's time for some fireworks! First, use your multiple superior calls from Dragdriver Luard to set up the following field:


Here is a quick breakdown of the combo pieces:
  • Dragwizard, Morfessa - key card that enables multiple attacks. Ensure that you have 4 other original grade 1 rear guards on your field in order to enable Morfessa's skill. Sometimes, you may want to consider omitting Dragheart Luard's retire two grade 1s skill if using that skill could compromise your grade 1 field count.
  • Strict Order Knight, Lluails - this card can dish out a very powerful attack, and can help to make up for the lesser number of Force I gifts on the front row circle it is on.
  • Black Sage, Charon - for replenishing counterblast. This helps for resource conservation and gameplay longevity since both Dragdriver Luard and Morfessa consume counterblast this turn.
  • Nightmare Painter - for replenishing soul. This helps for resource conservation and gameplay longevity since both Charon and Abyss Router (explained later) will utilise soulblast this turn.
  • Sage of Risk, Decremps - this would allow grade 1 front row rear guards to be able to intercept in order to defend at the end of this turn if you did not win.

Feel free to set up different variations of the board if the situation calls for it. For instance, if you have a lot of soul that has yet to be utilised, perhaps you can consider superior calling Abyssal Owl instead of Nightmare Painter to get more draws, since your soul does not need to be replenished at this time.

Also, note the placement of your Force I imaginary gifts as they would be important contributors to the power distribution across your field (three gifts should be on the circle that Morfessa is on).

Before we begin, ensure that you have one copy of Abyss Router in your drop zone. You can accomplish this either by guarding with it from your hand in earlier turns, healing it from the damage zone, or calling it out using Dragdriver Luard's skill and then replacing it with another combo piece. Also, ensure that you have one grade 0 card in your hand.

Now, let's go through the attack pattern for the second grade 3 offensive turn.

  • 1st attack: Lluails (unboosted) with 30k, 2 crit
  • 2nd attack: Morfessa (unboosted) with 40k, 2 crit
    • End of battle, activate Morfessa's skill, counterblast 1 retire herself, call out Abyss Router from the drop zone
    • Abyss Router's skill, when placed, soulblast 1 and call a grade 0 card from hand (call it over Lluails), and draw a card

  • 3rd attack: Abyss Router (boosted by Charon) with 48k, 2 crit (hit magic number against 13k base force clan vanguard)
  • 4th attack: Dragdriver Luard vanguard attack with 41k
  • 5th attack: grade 0 (boosted by Nightmare Painter) with 25k before triggers

From this attack pattern, you can see that:
  1. The rule of weakest to strongest attack power is followed, at least within the 2 crit rear guard attacks
  2. Force I gift stacked on Morfessa is maximised out, resulting in two high-powered 2 crit attacks
  3. Magic power hit as much as possible
  4. Five attacks achieved
This attack pattern is very useful when your opponent is at an even number of damage count (e.g. two or four damage) as they will be threatened with lethality if they were to no guard any of the 2 crit attacks. However, if your opponent is at an odd number of damage count (e.g. one or three damage), you may want to consider attacking with your vanguard first, before continuing with the same order of attack for the other attackers. This is to encourage your opponent to no guard the high-powered vanguard attack to reach an even number of damage count, at which point they will become threatened by the wave of 2 crit attacks. Remember to pass any criticals from critical triggers to a rear guard instead of the vanguard so that your opponent will not remain at an odd damage count. Also, take note that in the original attack pattern, the Dragdriver Luard's power level decreases by 5k after Lluails is replaced by the grade 0, since you have one less grade 1 rear guard on the field.


If you were lucky enough to be able to ride another copy of Dragheart Luard on your second grade 3 turn, this would be how you place your additional Force I gift: three on Morfessa's circle still, and two on Lluails'. This would allow your 1st attack to be 40k, 2 crit.


Now let's go on to a comprehensive breakdown of the decklist.

Deck breakdown

  • Triggers: 8 crit 4 draw 4 heal - since it is a slow deck, draw triggers can help to draw into Dragheart Luard and your other pieces. With a lower number of grade 2s than usual, draw triggers can also reduce the chance of misgrade. However, putting too many draw triggers can affect the overall shield quality of your hand and diminish the crit pressure from your offensive turns. Go ahead to switch to heal guardians when they release in the English format as they do help in surviving in the early game, as well as give yourself one counterblast if your opponent is damage denying you (often, one counterblast is all you need to get the engine going).
  • Dragwizard, Knies x 4 and Cherishing Knight, Branwen x 4 - this deck is good only if you ride Dragheart Luard as your grade 3 vanguard, with significantly disastrous consequences if you end up riding Dragdriver Luard from your hand instead. As such, there is a need to maximise grade 3 ride consistency by running eight of these potential grade 3 searchers. Knies also helps to fetch Dragwizard, Liafail as a grade 2 ride, which can help since this deck is running a lower number of grade 2s than usual.
  • Strict Order Knight, Lluails x 1, Sage of Risk, Decremps x 1, Nightmare Painter x 1 - these are some of the combo pieces used by the deck. One copy of each is often sufficient since Dragdriver Luard is capable of searching them out from the deck, while Dragheart Luard is able to recycle them from the drop zone back to the deck as needed.
  • Black Sage, Charon x 2 - although this card is also a combo piece, it is run at two copies in order to enable the strong grade 2 turn formation of double Liafail-Charon as shown at the beginning of this article.
  • Abyss Router x 2 - this combo piece is slightly more challenging as it needs to actually end up in the drop zone rather than just on the field. Running two copies increases your chance of healing it from the damage zone, or getting it into your hand and manually guarding with it. Some people would prefer using Apocalypse Bat as their 5th-attack enabler, but personally I found it to be even less consistent and harder to pull off than Abyss Router, since you would now require one Apocalypse Bat in soul and one Apocalypse Bat in the drop zone.
  • Abyssal Owl x 2 - helps to draw cards. This fills up the rest of the grade 1 slots.
  • Dragwizard, Liafail x 4 - strong on grade 2 turn, and run at four copies to maximise the chance of Knies eliciting a plus with his check top seven skill.
  • Dragwizard, Morfessa x 4 - also a combo piece, but run at four copies to reduce the risk of misgrading on grade 2. The deck is already featuring a reduced number of grade 2s.
  • Dragheart, Luard x 4 - please run four copies of this so that you can maximise the chances of riding and re-riding him. Often, I find myself recycling the Charon-Nightmare Painter pair from the drop zone back to the deck every turn with his skill, and calling them back out with Dragdriver Luard to regenerate resources.
  • Dragdriver, Luard x 4 - some people argue that three copies of this is sufficient, but I would prefer to put as many in the deck as possible. This is so that when I 'stride', I'm removing a non-trigger from my deck, rather than running out of 'strides' in the deck and being forced to return it from drop zone to deck with Dragheart Luard's skill.

Concluding remarks

This Shadow Paladin deck has managed to stay in the top rungs of the V-Premium format for an extended period of time due to its field consistency engine, field advantage engine, and insane offensive turns. In the face of increasing early game offense and survival capability of newer upcoming V-Premium decks, it is yet unknown whether this deck can remain on top of the game with the changing environment. Nevertheless, it is one of the coolest combo decks to play in this format, and it was certainly fun to go through the nitty gritty details of it in this article. Do let me know in the comments if you have any differing opinions from whatever has been mentioned here. Enjoy the game, and stay safe everyone!