Wednesday, 16 December 2015

General Strategy: Stride Rule #1

On our genesis clan analysis post, we made mention of Stride Rule no. 1, which may have raised a couple of eyebrows for some of you skeptics.

This is the rule as stated:

Your opponent guards for 2 pass, and you have a Vanguard that does triple drive. If your first drive check is a trigger, you should all-in, because the chance of netting an additional trigger on 2nd or 3rd drive check is high.

Imagine a common scenario: You smile to yourself as you declare an attack with your stride unit, knowing your opponent has to guard your attack. (extremely evil on-hit effect or extremely evil attack when your opponent is at 4 damage) Well, your smile starts to fade a little as you notice your opponent's eyebrows starting to knit. I mean, you didn't even bother to announce the power level, knowing the effort would go to waste if your opponent smacks a perfect guard on the table.

But alas, your opponent starts putting down 10k shields with contemplation, hesitating a little. (At this point, your own eyebrows start to knit) Finally, your opponent says, "two to pass". Taking a deep breath, you reveal the top card of your deck.

It's a trigger. What now?

And so, the question arises: should you pass the trigger effect to your Vanguard, knowing that you have two more chances to check a trigger?

It's the kind of thing that could spark off some friendly debate among friends or in forum discussions, an idea which taunts at the nerd within you. Intuitively, you "feel" that it's right because in many games, you opt for the safe route, and then regret it as soon as you check a second trigger that could have had devastating (and extremely evil) effects.

What, then, are the actual probabilities? If you're interested to see the calculations, scroll down a bit more. For now, let's focus on the results.

Okay, so your first check is a trigger. Let's just say we want a probability of at least 50% to check another trigger in the next 2 drive checks. In other words, we are interested in cases where we can succeed most of the time.

If it's a serious game, you'd better start counting your triggers, because that may affect your decision. It's pretty obvious that if you have more triggers in your deck, the chances of success will be higher. And of course, you'd fare much better with a "thin" deck that contains higher trigger density.

So, let's consider the probabilities when we have, say, 30 cards left in our deck:

Scenario: Triple Drive! First check is a trigger!
y-axis: Probability of second and third check containing 1 or 2 triggers
x-axis: Number of triggers in a deck of 30 cards
The red bars highlight cases where the probability has risen over 50%, and these are the cases when we want to all-in. In summary, what this bar chart tells us is that when we have 30 cards left in our deck, we should expect to succeed most of the time if we have at least 9 triggers left in our deck.

Here is the full list of the minimum number of triggers required for a 50% success rate for different amounts of cards left in your deck:

For 10 cards in deck: at least 3 triggers left
For 11 - 14 cards in deck: at least 4 triggers left
For 15 - 17 cards in deck: at least 5 triggers left
For 18 - 20 cards in deck: at least 6 triggers left
For 21 - 24 cards in deck: at least 7 triggers left
For 25 - 27 cards in deck: at least 8 triggers left
For 28 - 31 cards in deck: at least 9 triggers left
For 32 - 34 cards in deck: at least 10 triggers left
For 35 - 38 cards in deck: at least 11 triggers left
For 39 cards in deck: at least 12 triggers left

Do you notice something about the trigger density required?

A general rule of thumb can be seen from this: you only require a deck of at least one-third triggers to have a better-than-average chance of benefiting from Stride Rule #1.

Considering that the initial proportion of triggers in a deck is 16 out of 49, or about a third, a well-shuffled deck with an even distribution of triggers should always contain about one-third triggers. This means that Stride Rule #1 would work most of the time for a well-shuffled deck!

I hope that this post has given a somewhat legitimate support to a rule that we mentioned in passing. It may seem a little bit crazy to be so rigorous on a game meant for fun, but it's always good to reassure yourself with extravagant details, because... why not? Good luck and have fun in your games!

Details of calculations

In my post, I only consider raw probabilities of drawing X number of triggers from a deck of N cards (without replacement). This can be done rather conveniently through the hypergeometric distribution function.

There are 4 inputs to this function: N (number of cards), X (number of triggers), n (number of cards drawn) and x (number of triggers drawn). It calculates the probability that, from a deck of N cards containing X triggers, after drawing (or drive checking, in this case) n cards, we get exactly x triggers.

In MATLAB, the calculations can be performed by the in-built function hygecdf(x,N,X,n).  For instance, in the case where there are 30 cards left in a deck of 9 triggers, we want to calculate the probability when we drive check 2 cards (n = 2) and get 1 or 2 triggers. Because this is a cumulative distribution function, it sums up the probabilities of all cases where we get x triggers or below. So, taking hygecdf(1,30,9,2) will give us the probability of checking 1 or 0 triggers. When we enter hygecdf(0,30,9,2) we get the probability of checking no triggers. Therefore, one way to calculate our desired probability is to take 1 - hygecdf(0,30,9,2), which gives us 0.5172.

This calculation can then be repeated for varying numbers of triggers (varying X) in a deck of 30 cards, to generate the bar chart shown. The same set of calculations was then performed with varying numbers of cards left in deck (varying N). From the set of probabilities generated in these calculations, we are only interested in the minimum value of X that would cause the probability to rise above 0.5.

One should note that such calculations are general and can, in fact, apply to a twin drive instead. It does show that you are indeed more than likely to check at least one trigger in a twin drive, given that your deck contains one-third triggers. This is by no means the only way to analyse the situation, and there may be some other way that could provide a more comprehensive outlook.

Tuesday, 15 December 2015

Deck Recipe: Diablo Formula... A Shadow Paladin Deck Upgraded from Legend Deck


<The Dark "Ren Suzugamori"> is the only Legend Deck to be released so far, featuring Shadow Paladin support in the form of new versions of cards that Ren use. A cost-effective pre-constructed deck in itself, this article presents one form of the upgraded deck that allows it to further unleash its potential.


Deck Name: Diablo Formula

G Unit

Grade 3

Grade 2

Grade 1

Grade 0

Deck Summary


This deck features a 10-crit 2-draw 4-heal trigger lineup to exert high crit pressure, while not totally compromising on drawing power at the same time. Here are some of the other differences from the original Legend Deck:
  • Usage of Perfect Guard G: counter charging is helpful in this deck
  • Addition of stride enablers: to facilitate the first stride, when Blaster Dark "Diablo"'s GB2 skill is not yet active
  • Replacement of the other grade 3 slot to Phantom Blaster Dragon: can search for a grade 3 which is potentially helpful, and has 'Blaster' in the card name to facilitate much of the deck's skills

Main Strategy


  1. Ride Blaster Dark "Diablo", stride Aurageyser Doomed first
  2. Subsequent 2 strides: Phantom Blaster "Diablo"
  3. If game still ongoing, stride Atmos and aim to finish the opponent
The first G Unit to stride in this deck would be Aurageyser Doomed, in order to achieve early retirement of the opponent's important rear guards, while not compromising on much yourself. Be sure to retire Promising Knight, David as part of the cost in order not to lose too many units.

Subsequently, stride Phantom Blaster "Diablo" to retire even more of your opponent's units, and pressure them to guard a high-power, high-crit centreline.

Much of the deck focuses on helping you recover your field after retiring your rear-guards as part of your G Units' skills. Here are some examples of ways to restore your rear-guards:

Dark Night Maiden, Macha is a good card to use. Superior call Dark Heart Trumpeter, which
then superior calls Pitch Black Sage, Charon. This sets up your field for the next turn, where
you will retire 3 rear-guards for Phantom Blaster "Diablo"'s skill.
Field restored and ready for the next turn!
Upon your second stride turn, attack with the rear-guard lane that is not Dark Night Maiden, Macha first.
"Diablo" attacks. Retire Charon and the previously boosted back row rear-guard
to force your opponent to retire two rear-guards himself before he can guard this attack!
Finally, use Macha's skill once again, just like the previous turn. Restore your field
and prepare for the next "Diablo" stride turn!
Another good example of an ideal field is when you manage to have a Macha-Charon lane, and a front row Dorint on the other lane. This is what you can achieve:
You can use Macha's skill to superior call a Dark Heart Trumpeter, but since you already have Charon
on your field, you can superior call Claudas instead, behind Dorint.
This creates a 22k Dorint-Claudas lane that can counter charge, while still able to retire Charon for your next turn.

Strengths and Weaknesses


When played well, this deck can really demolish your opponent's field formation, being able to retire 8 of your opponent's rear guards in a single game at best. At the same time, a lot of pressure is applied to your opponent in the form of "Diablo", and there is a constant reminder for the opponent to have at least 3 rear guards on his field in order for him to be able to guard in the first place.

Blaster Dark "Diablo"'s GB2 skill also helps the deck along in terms of consistency. Allowing you to discard any card to stride "Diablo" is very useful in situations that would have been detrimental to other stride decks, where you do not have proper stride fodders on your hand.

Problems start to arise when the crucial starter vanguard (Promising Knight, David) gets retired by your opponent before you perform your first stride. In this case, you can still use Aurageyser Doomed if you are able to get Charon to your field during your main phase. If not, you may have to resort to striding Aurageyser Dragon, in order not to lose too many of your cards.

Another possible issue is when you are forced to ride Phantom Blaster Dragon. In this case, try to use its skill to search for Blaster Dark "Diablo", to ride next turn. This is because having Blaster Dark "Diablo" as your grade 3 vanguard contributes significantly to the overall mechanics of the deck for the two "Diablo" stride turns.

Frequently Asked Questions


Q: What is the 8k power Darkness Maiden, Macha for? Isn't that an old card?

A: Darkness Maiden, Macha is an alternative solution to superior calling your grade 1s in the case where you need to restore your field but do not have any Dark Night Maiden, Machas or Dark Heart Trumpeters in your hand or field. Furthermore, it can be used even before riding grade 3, as long as you have enough counterblast to pay the cost, allowing for an early superior call.

Q: Why am I striding Aurageyser Doomed first, instead of Aurageyser Dragon? Am I not wasting its autocrit skill if I stride Doomed so early?

A: Although the autocrit skill is wasted, you can achieve an early retirement of your opponent's field, which could go a long way in disrupting your opponent's strategy. Furthermore, Aurageyser Dragon's skill consumes soul, which then reduces the number of times you can use Dark Heart Trumpeter to restore your field.

Q: What happened to Grim Recruiter?

A: Grim Recruiter is a G Unit that is potentially useful in a Legend Deck, as it can call grade 1s that can then chain superior call once its attack hits. However, it does not allow GB2 to kick off when used as the first stride. It is recommended to activate GB2 immediately after your first stride so that you will not get into the situation where you can't stride the next turn, especially since Fullbau Brave is no longer your starter vanguard. Striding Aurageyser Doomed as first stride instead helps you to achieve GB2.

Monday, 14 December 2015

Deck Recipe: Machinings - The rise of the insects


Megacolony is a crime syndicate made entirely of insects. Their primary mechanic revolves around "paralyzing" the opponent's units, preventing them from standing during their next stand phase, which in turn prevents them from boosting or attacking.

However, skills of such a level are merely pesky insect bites in today's meta. With the advent of stride generation, Megacolony has attained a new mechanic of paralyzing the opponent's vanguard consistently. This has caused a few Megacolony champions to emerge in tournaments all over the globe, making this clan tournament viable for the first time ever since Bt15. The sole reason of Megacolony's success is its subclan the Machinings. Being a Megacolony fan ever since Master Beetle, I'm very happy that bushiroad has given this clan a unique mechanic and substantial support so much so that it has surpassed its limits of being a non main clan to 'metacolony' today. Below is my take on the Machinings series as well as a full decklist with explanation.

Deck : 'Machinings, DESTROY!'

Grade 4: Total 8

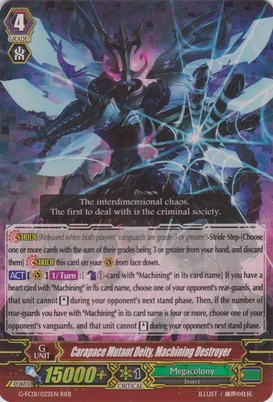
-4 Carapace Mutant Deity, Machining Destroyer
-2 Force Spear Mutant Deity, Stun Beetle
-1 Poison Mutant Deity, Paraspear
-1 Snow Element Blizzard

Grade 3: Total 8

-4 Machining Stag Beetle
-4 Machining Warsickle

Grade 2: Total 12

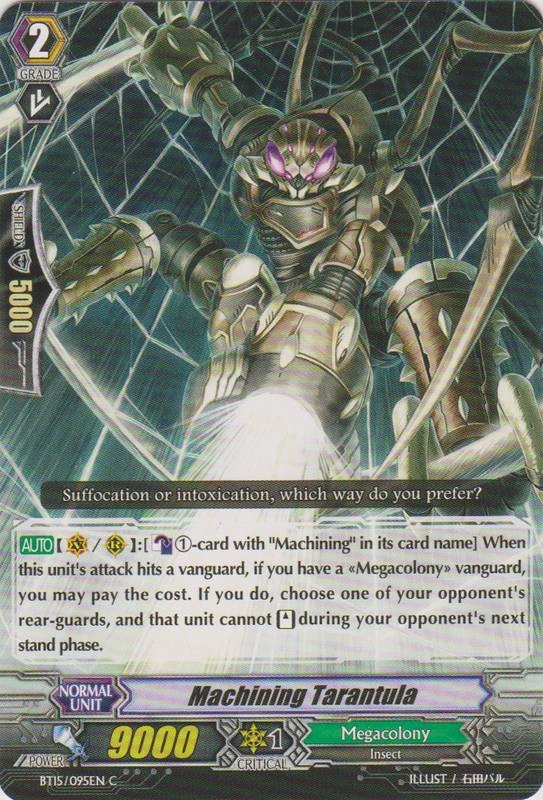
-4 Machining Tarantula
-4 Machining Mosquito Mk II
-4 Machining Red Soldier

Grade 1: Total 13

-4 Rebel Mutant Star Shield
-3 New Face Mutant, Little Dorcas
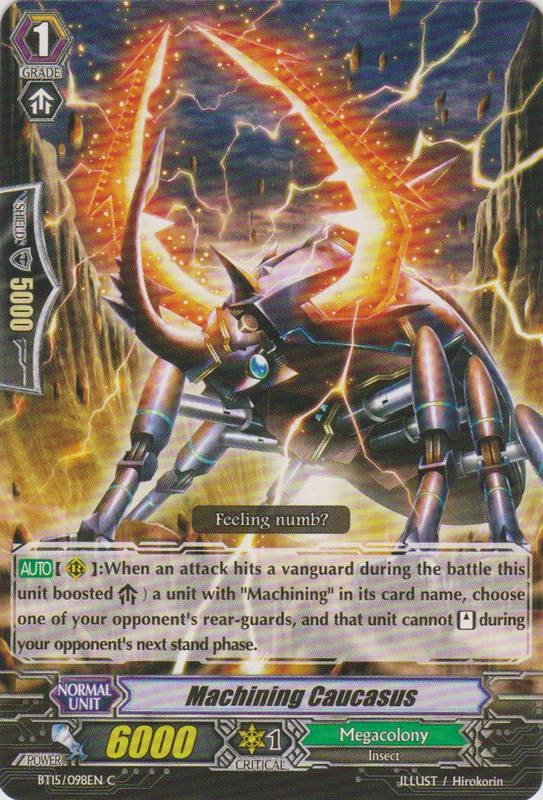
-3 Machining Caucasus (my avatar)
-3 Machining Black soldier

Starter: Machining Little Bee


Triggers: all Machinings 8criticals 4draws 4heals


The star of the deck, Carapace Mutant Deity Machining Destroyer. Nuff said, destroyer of the worlds.


                                             G-FC01-022EN-RRR

With a cost of especial counterblast 1 Machining, this card can prevent your opponent's vanguard and 1 rear guard from standing for 1 turn. On the surface this card does not look so impressive as reriding again would fix the vanguard stun. However like a spider that spun its web, this destroyer is waiting for unsuspecting victims dumb enough to underestimate its ability to fall into its pit of despair! Assuming that a standard deck runs 8 grade 3s, being able to reride and stride after the first stun would cost you three grade 3s. That alone is the cost needed to overcome this units skill for 1 turn. The number of grade 3s left in your deck would normally be around 3-4 after reriding for multiple stride turns and this is where the opponent finds himself at a dead end with no more grade 3 to reride. Striding over a rested vanguard would cause the vanguard to take the position of the heart, which does not solve the issue. Losing the ability to drive check, the opponent is forced to bet his first draw to be a grade 3 in order to survive. Failing to do so would result in no vanguard attack, no drive checks and ultimately a very low hand size with an insufficient offence or defense.


                                              EB01-005EN-RR


The ideal ride, Machining stag beetle can easily give you 2 rear guards at rest for free to fulfill the cost of Machining Destroyer. Using cards like Machining little bee, we can easily convert the booster into a standing rearguard. As the vanguard lane is powerful enough not to have a boost, its better to 'transfer' a vanguard booster into a 'standing' rearguard. 

It is also noted that you should pay the cost for Destroyer before using little bee if you only have 4 rear guards then. 
Another notable combo is to use little bee to stand either Machining Mosquito mk II or a 7k booster, hence forming a 21k lane with an on hit pressure, increasing the power by one stage.

                                             FC02-025EN

The not so ideal ride. However, it acts as a good backup with the limit break to stun the opponents vanguard. The primary skill is also useful to increase the number of rearguards with an especial counterblast to help with the cost of Machining Destroyer. 

Comparatively, these grade3s are the most ideal as compared to the Machining legion counterparts as they do not help with the cost of Destroyer. Arguably legions are better backups, however the main gist of the deck is focused on striding and paralysing the opponents vanguard. Failure to do so would result in defeat and running backups that do not paralyze the vanguard would eventually lead to your own defeat due to the subpar skills that Megacolony has. If only the legion was an on-legion VG paralyse....

Other notable mentions include Machining Mosquito Mk II

                                             G-BT04-039EN-R

Early pressure 11+7 =18k against a 7k vanguard is a three stage attack that requires 15k of shield to guard. should the attack hit it would be a paralyze 1 and you get to stand one of your rear guards hence being a plus 1 and minus 1 attack for the opponent. such a pressure card if used early would prove to be very deadly due to the power lanes.


The rest of the deck would be very intuitive, with Machining tarantula and Caucasus being on hit pressure lanes. Machining Tarantula is best ridden on the VG circle at G2 turn, since with any 5k booster behind the VG the opponent is only able to guard 10k for 1 pass or 15k (dropping 2 cards) for no pass. This often means that the opponent will either have a RG paralysed (if Tarantula hits), or the opponent drops a 10k shield for the vanguard early game. Also, if you are able to call Caucasus behind the Vanguard early game, this essentially gives you additional free RG stun each turn, making it an extremely powerful early game card worth running at 3 copies, even if it is only a 6k booster.


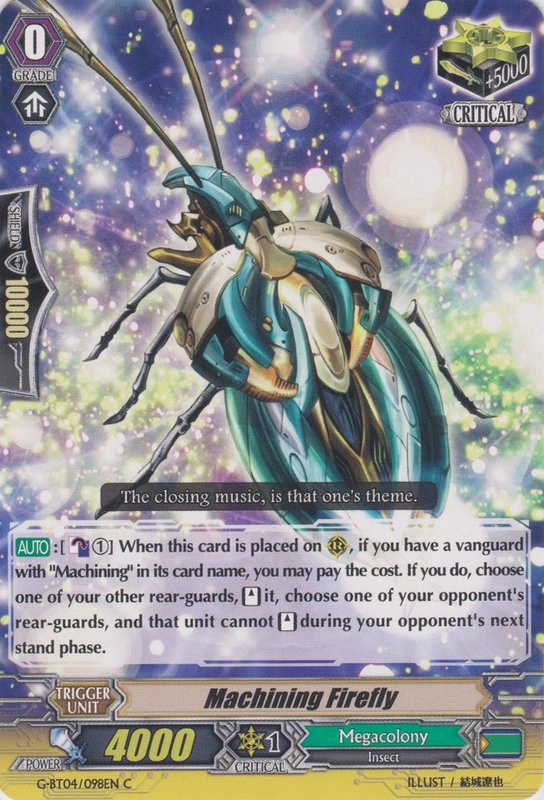
Machining firefly (critical trigger) is also a potent card being able to counterblast 1 to stand a rear guard to help stand both rear guards called out by stag beetle. One point to note is that Machining red soldier helps to fix machining firefly into a 16k lane.


Tips to play this deck:
-Due to the nature of this deck, try to superior call as many rear guards as possible instead of calling them for maximum advantage.
-The grade ones have 2 units that are non Machining and given a choice, do not ride then as Stag Beetle would not be able to call them out of the soul.
-If you have both Machining Warsickle and Machining Stag Beetle, but only able to call out 1 machining unit from the soul due to having ridden a non-machining G1 (PG or Stride Enabler), it is better to ride Warsickle because its LB4 ability is better in the long run as a backup in case you can't stride. 
-Use Stun Beetle when your opponent is unable to reride and you can confirm that he has no perfect guards for a sure stun and prevent your opponent from normal riding to ensure your victory against 6th damage heals.
-perform your vanguard paralyze every turn and do Megacolony proud.

Tips to play against this deck:
-Link jokers locks make it impossible to fulfill the criteria of 4 Machining rearguards.
-Retire decks like Kagero or Narukami are effective against this deck as they prevent the opponent from having 4 machining rearguards easily.
-CONSERVE your grade 3s in your hand! pay the cost of stride with grade 1s and grade 2s if possible never discard your grade 3 to stride unless you have enough to reride.
-NEVER let Stun beetle hit. Its over for you if he hits.
-If you cannot reride, attack his rear guards instead of the vanguard, deny him of the especial counterblast he needs to stun your vanguard again and hope for the best and wait out till its your turn  again. 
-Never underestimate this deck, ask your opponent if you are unsure of his effects.


That's all guys, hope I have given you a good breakdown and some tips of the Machinings subclan of Megacolony, stay tuned to my next article about G-Megacolony (Darkface). Have fun paralyzing your opponent vangaurd, winning isn't everything, remember to also have fun! Long live Megacolony!

Yours truly,
Just another Megacolony fan.

Thursday, 10 December 2015

Card Review: Fighters Collection Winter 2015 Review: Part 1


Hi everyone.

Welcome to the first Fighters Collection Winter 2015 Review. I'll featuring some of the more interesting cards and positing my thoughts on some of these cards. Today, I'll be mainly focusing on the older cards that had been largely bypassed in the Legion and Stride era and had only gotten support recently in FC Winter 2015. In my opinion, these cards targeting at reviving older cards and abilities are particularly interesting because they generally get the best of both worlds: older cards that work pre-GB1, and new boss units that can be used in the mid and late game, along with more generic stride support for their clans.

Kagero, Seal Dragons Revival

 The Seal Dragons as a Kagero archetype were first expanded upon in BT-11, with a playstyle revolving around the opponent's G2 rearguards, either through preventing intercepts, gaining additional power or other special effects. Having neither Legion or Stride units, the Seal Dragons were largely unplayable in today's meta until the release of a new Seal Dragon stride and a new G2 support for the archetype.


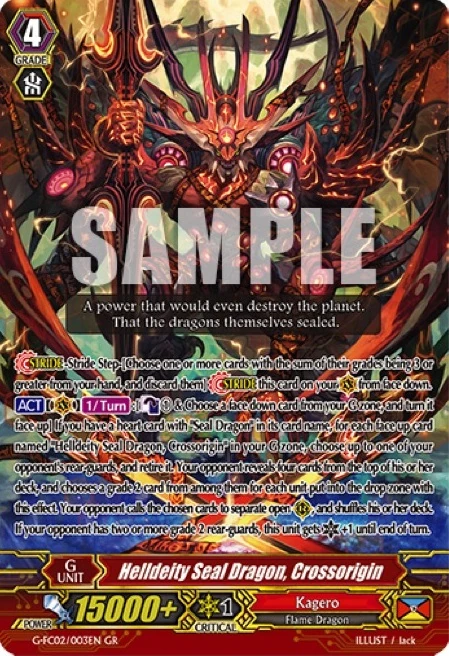
The new Seal Dragon boss, Helldeity Seal Dragon, Crossorigin, is a new powerful unit that gives additional offence to the Seal Dragons as well as disrupting the opponent's field.

[ACT](VC)[1/Turn]:[Counter Blast (1) & Choose a face down card from your G zone, and turn it face up] If you have a heart card with "Seal Dragon" in its card name, for each face up card named "Helldeity Seal Dragon, Crossorigin" in your G zone choose up to one of your opponent's rear-guards, and retire it. Your opponent reveals four cards from the top of his or her deck, and chooses a grade 2 card from among them for each unit put into the drop zone with this effect. Your opponent calls the chosen cards to separate open (RC), and shuffles his or her deck. If your opponent has two or more grade 2 rear-guards, this unit gets [Critical]+1 until end of turn.


Basically, if you are able to fulfil the condition of your opponent having two or more grade 2 RGs, your vanguard gains +1 crit on first stride, which is a lot stronger than most GB2 auto-criticals, since by the time you stride a second time, your opponent may well have been pushed to 5 damage, making any auto-criticals useless (To me, it seems like just another sign of power creep. Yet on the other hand Bushiroad did a great job designing a card that makes Seal Dragons relevant and a threat again in today's meta).And fulfilling this condition is not that hard due to the Seal Dragons speciality and the ability of this card to force an opponent to call a grade 2. Undoubtedly, one way to play around this card is to not call more than 1 g2 rearguard, or call a column composed of g3 and g1. However, this greatly compromises the offensive power of the opponent in order to avoid the auto-crit condition. Either way, the opponent is caught in a bad position in which the Seal Dragon player benefits merely by the presence of this stride.

Great card and nice art overall.


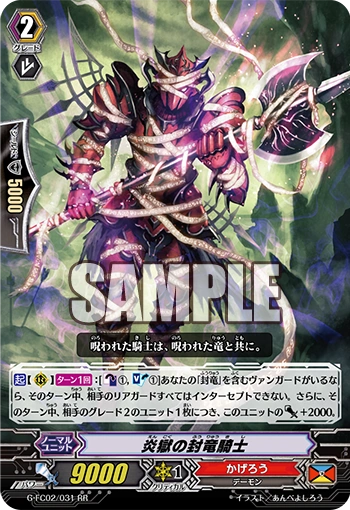
The new Seal Dragons support is also remarkably good. Hellfire Seal Dragon Knight's ability is as follows.

[ACT](RC)[1/Turn]:[Counter Blast (1) & Soul Blast (1)] If you have a vanguard with "Seal Dragon" in its card name, all of your opponent's rear-guards cannot intercept until end of turn. Then, this unit gets [Power]+2000 for each of your opponent's grade 2 units until end of turn.

This once/turn skill has no GB restriction, which is a bonus, but of course this card shines most late game. The strength of all G2 RGs lies in the fact that they can function equally well for offensive and defensive purposes, by transiting into intercepts at the end of a player's turn to guard for 5k if needed. This card destroys that by making it impossible for opponents to make use of their grade 2s as intercept, thus losing them 2 5k shields. As I see it, having this card on the field gains the Seal Dragon player 2 benefits. Firstly, being unable to guard with g2s tempts the opponent to focus one RG column on attacking the Dragon Knight in a bid to remove this card from play. This is great for a Seal Dragon player because it effectively saves the player 10k shield. Secondly, this card is basically an offensive card because it makes it harder for the opponent to guard, while at the same adding power, although this is a small bonus that only becomes significant at 3 g2 rearguards.

Overall, this is a useful support card for Seal Dragons.


Pale Moon, Nightmare Dolls Revival

The Nightmare Dolls are a series of Workeroid cards with "Nightmare Doll" in their name. They did not really have significant or unique mechanics on their own initially but after the introduction of Nightmare Doll support in G BT 05 and Fighters Collection 2015 Winter, they quickly became an archetype in their own right. The support introduced in G BT 05 and FC 2015 Winter revolved around making Nightmare Doll, Alice relevant for the Stride Age, using support cards such as Catherine to search for Alice and Ginny to call Alice out from soul. Without any GB1 requirements, the Nightmare Doll deck is fast, powerful and a real nightmare to fight. A Nightmare Doll decklist may be provided at a latter date by one of our own resident editors.


Nightmare Doll of the Abyss, Beatrix, is a stride unit meant to support the Nightmare Dolls deck. Without the need for any counterblasts in a counter-blast heavy deck, it basically gives two additional RG attacks at the cost of -1 (moving one unit into the soul).

[AUTO](VC):[Choose three of your <Workeroid> rear-guards, and put them into your soul] At the end of the battle that this unit attacked a vanguard, if you have a heart card with "Nightmare Doll" in its card name, you may pay the cost. If you do, put this unit into your G zone face up, choose up to two <Workeroid> from your soul, and call them to separate (RC).

What is truly scary about this card is its combos with Alice. After attacking with your two RGs and Beatrix's main VG attack, you get to call out two additional RGs (one who can be an Alice from your soul) for additional attacks. This card supports the Catherine-Alice interface by returning to the G-Zone at the end of the battle, allowing Catherine's effect to activate on a RG Alice. Beatrix is incredibly powerful stride because by itself, it enables a minimum of 5 attacks (2 RG attacks, 1 VG attacks, 2 RG attacks). With the combos with Alice, the Nightmare Doll player can continue attacking until he runs out of Counterblasts.

Beatrix is truly a fearsome card and possess a lovely art as well.


Oracle Think Thank, Witches Revival

I am not too sure if I could term it a revival, given that the witches in OTT were pretty strong to begin with, and had aged well in spite of the Stride Age. However, now we have new support for the Witches, let's see what we got.


[AUTO]:[Choose a card with "Witch" in its card name from your hand, and discard it] When this unit is placed on (VC), if you have a heart card with "Witch" in its card name, you may pay the cost. If you do, your opponent may choose two cards from his or her hand, and discards them. If he or she does not discard two cards, you choose one of your opponent's vanguards, deal 1 damage, and during that damage check, all trigger effects are nullified.

Our new ace stride for the Witches. As a non-GB2 restricted stride, this card is relevant at all damage points in the game, as there are not restrictions on how many damage does your opponent needs to be at before the skill can be activated, making this card extremely useful at virtually any strideable stage of the game.

Here are some of the scenarios.

1) Opp at 2 damage: Have to decide between discarding 2 or running the risk of going to 3 damage, running the risk (quite significant) of being double crited and losing the game.

2) Opp at 3 damage: Have to decide between discarding 2 or running the risk of going to 4 damage. At four damage everything changes because it is no longer possible to take the most powerful attack (the VG attack) safely, i,e, he must perfect guard the VG. Furthermore, if the witch checks a single crit trigger he would be forced to guard the RG attack, leading to at least -4 on your first stride (2 for PG, 2 to guard 15k shield).

3) Opp at 4 damage: Becomes less useful at this stage. The differential in guarding from 4-5 damage is less significant. Although pushing the opponent up to 5 damage also means that he needs to guard all attacks, resulting in the loss of 5-6 cards this turn if not outright loss.

4) Opp at 5 damage: One of the strongest uses of this card. You can imagine a Witch player after striding Takemikazuchi at GB2, and instead of striding Takae again, opt to go straight for the kill at 5 damage by striding this unit. The opponent is forced to -2 or lose instantly, making it even harder for the opponent to survive against the OTT player.

This card is easily the strongest minus hand advantage card that puts Nubatama to utter and complete shame :(. The opponent is forced to make a choice between losing hand advantage or suffer damage advantage both which benefits the OTT player (either pushing the opponent to late game or minusing his defence). While an opponent player who may be able to scrape through at 5 damage while having only 5 cards in hand, this card virtually guarantees that the opponent cannot survive. Even if he is tempted to take the damage and hope for a heal,this card's ability nullifies all trigger effects from the damage check taken by Mimi's ability.

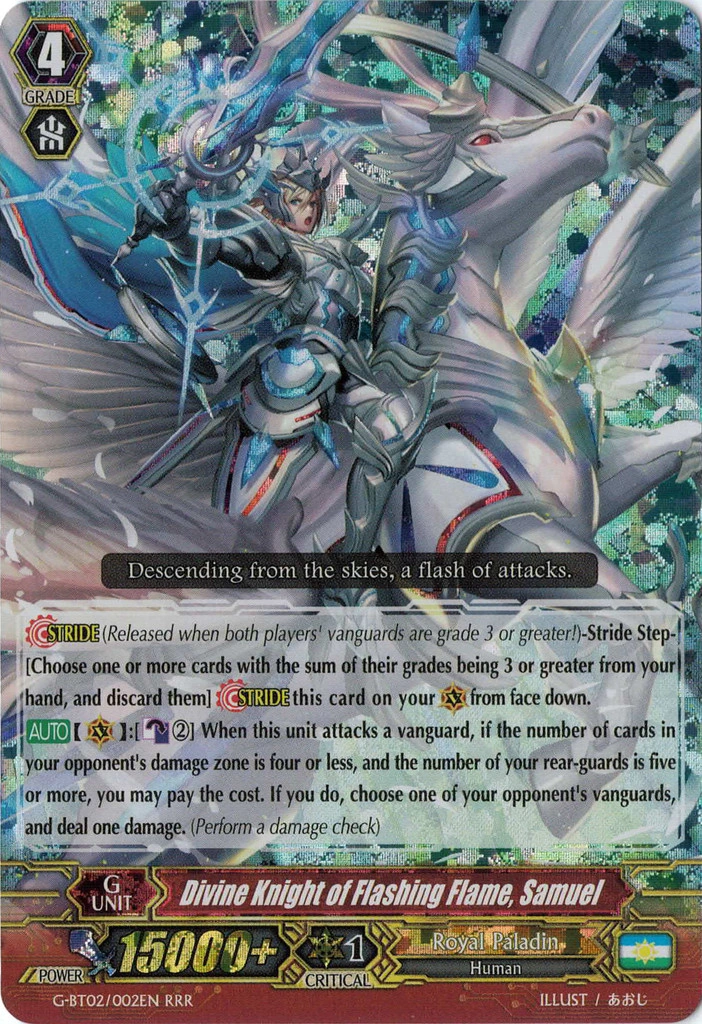
The OPness of this card can be further put into perspective. This is a straight up -2 for the opponent in exchange for a -1 from the Witch player who can afford it because it has a naturally large hand advantage by virtue of its G3 support and the Takae stride. In other words, the Witch player can afford to pay for the cost easily, while further taxing the resources of other decks that may not be so well-endowed. Whereas a Nubatama player would kill to have such a card ability (permanent -2 or take damage), this card is even stronger in OTT due to the ease that an OTT player can pay for the cost. Furthermore, it is much stronger that similar cards like Divine Knight of Flashing Flame, Samuel due to the lack of any Counterblast requirement that can be saved for other cards like Take, as well as being usable at 5 damage.

In conclusion, this is a card to be feared. It's art and effect are badass...


Another excellent Witch card support. Rose Red Witch, CuCu's ability is as follows.

[AUTO]:[Counter Blast (1)] When this unit is placed on (VC) or (RC), if you have a vanguard with "Witch" in its card name, and the number of cards in your soul is one or less, you may pay the cost. If you do, draw two cards, choose a card from your hand, and discard it.

Essentially a backup card for CoCo, with no Generation Break requirement for an easy +1. Nothing more to be said. Get out of my deck Susanoo!!!

Thank you all for reading.

Sunday, 6 December 2015

Deck Recipe: Genesis Clan Analysis and G-Genesis Deck List

Welcome to the 2nd of our clan analysis and featured decklist articles.

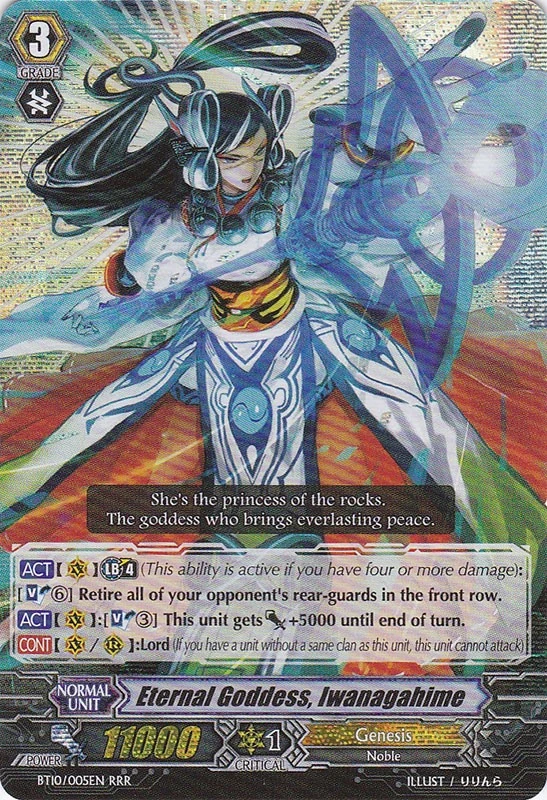
Genesis is a conglomerate of mythical beings, hailed to be the successors to Oracle Think Tank. (when was it first debuted?) The clan revolves around adapting the abilities of other clans and replacing the cost with soul blasting. For example, Eternal Goddess, Iwanagahime soul blasts to retire the opponent’s front row, an effect similar to Dragonic Kaiser Vermillion’s skill.


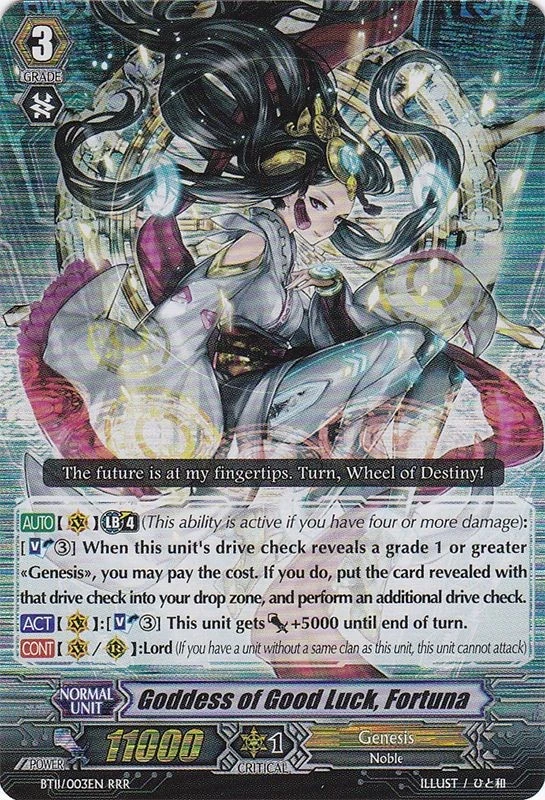
Genesis also takes on the mantle of divination. Goddess of Good Luck, Fortuna increases the possibility of getting a trigger by soul blasting whenever you drive check a grade 1 or greater unit to pitch the unit and perform another drive check.


Ever since its introduction, the consistent theme and speciality in Genesis had always revolved around activating its abilities through soul-blasting. This is no different from its latest support in the Generation Era in G BT 04.

The most recent Genesis support evokes a Royal Paladin-style superior calling, revolving around the theme of Norse mythology. It also fixes a key issue of most Genesis decks: inconsistent soul-charging. Divination is now much more deadly, with a new stride unit that can rearrange the top cards of your deck before you even drive check. Below is the new G-era deck list for Genesis.


Fimbulwinter

G4
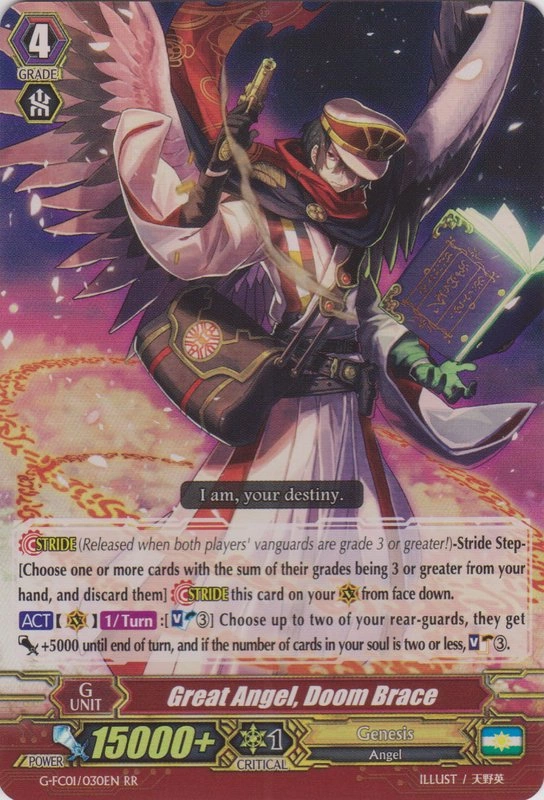
Great Angel, Doom Brace x 4
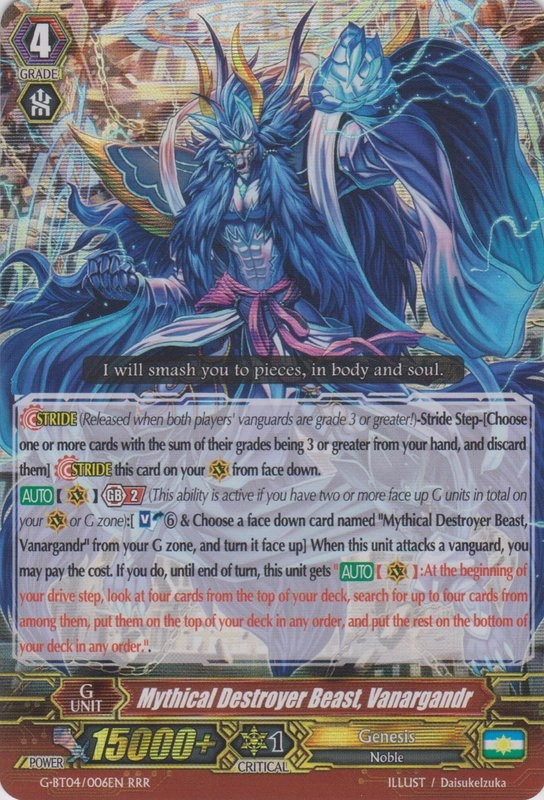
Mythical Destroyer Beast, Vanargandr x 4

G3
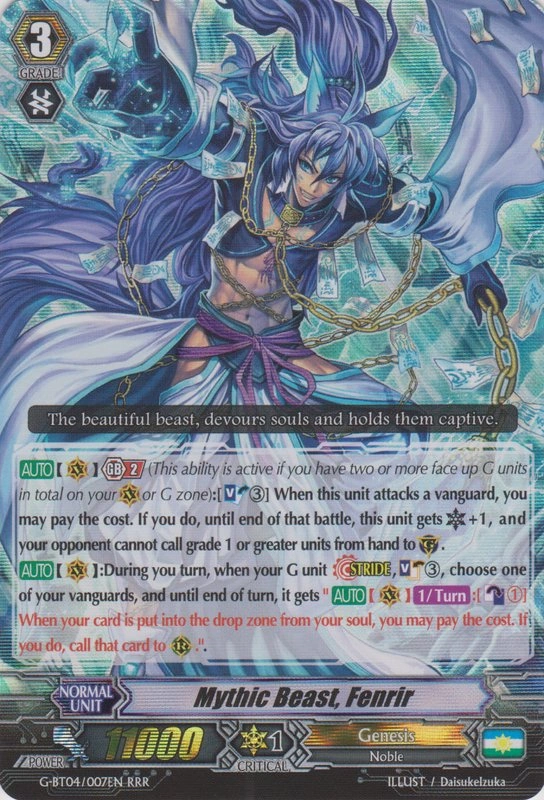
Mythic Beast, Fenrir x 4
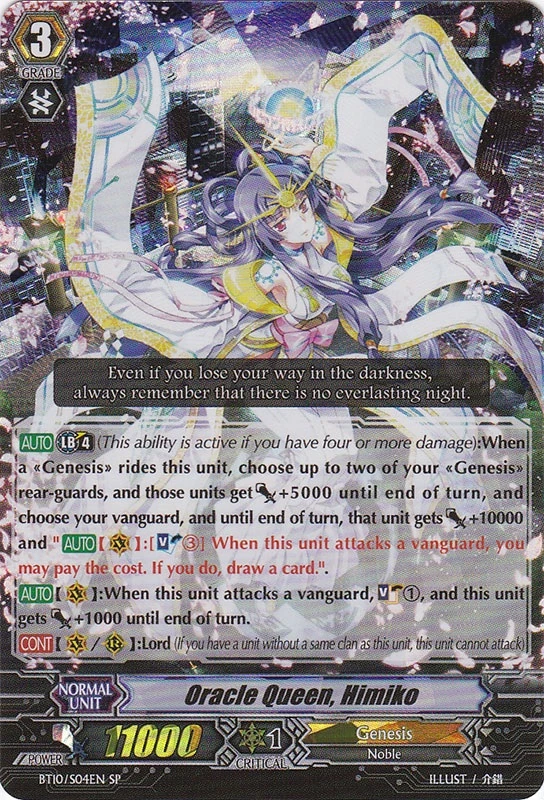
Oracle Queen, Himiko x 2
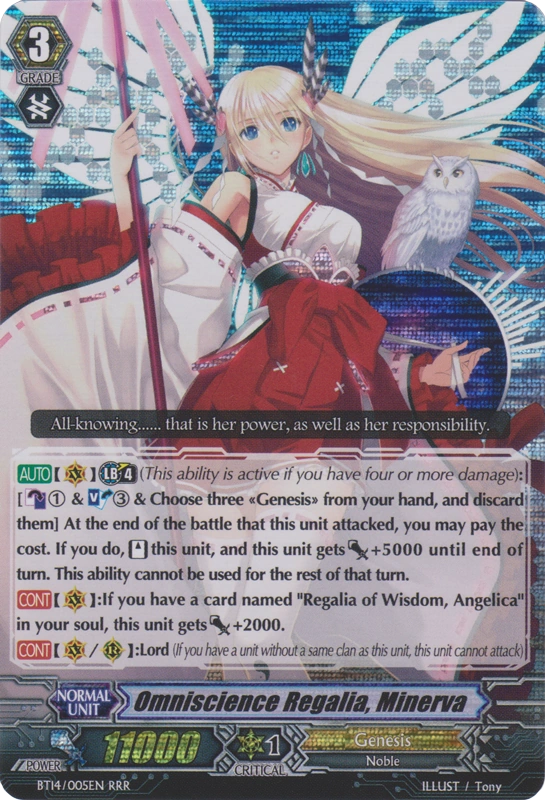
Omniscience Regalia, Minerva x 2

G2
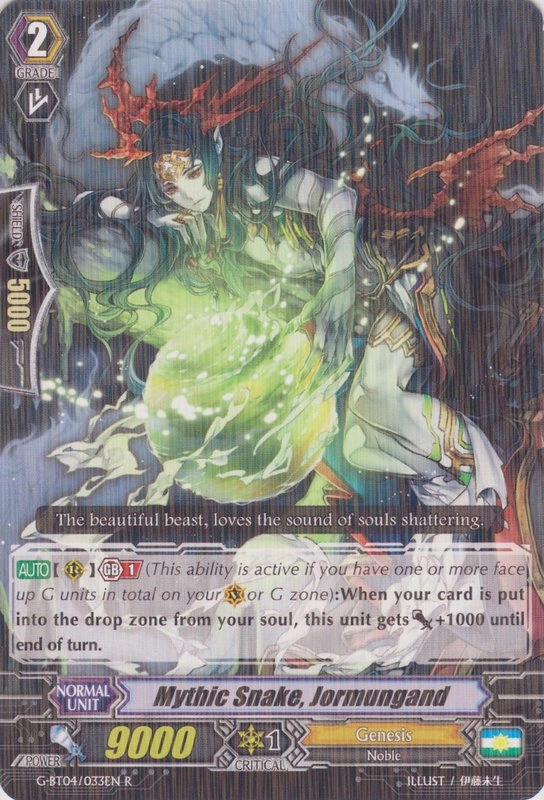
Mythic Snake, Jormungand x 4
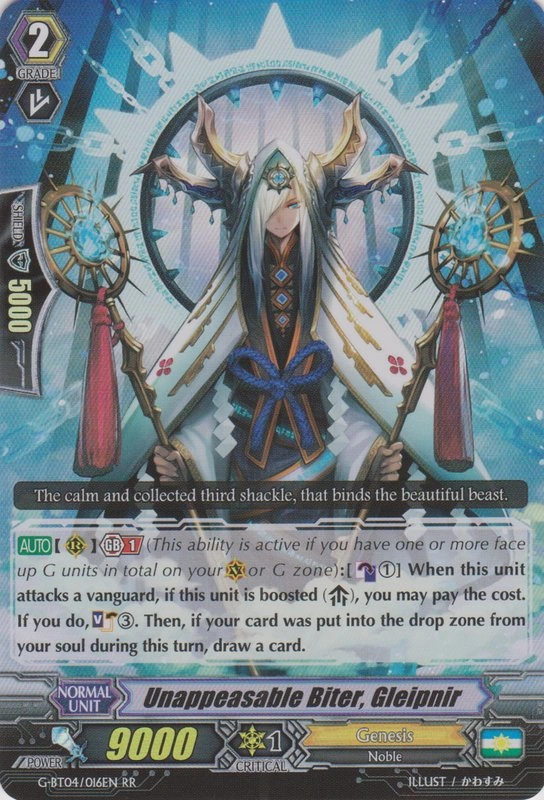
Unappeasable Biter, Gleipnir x 4
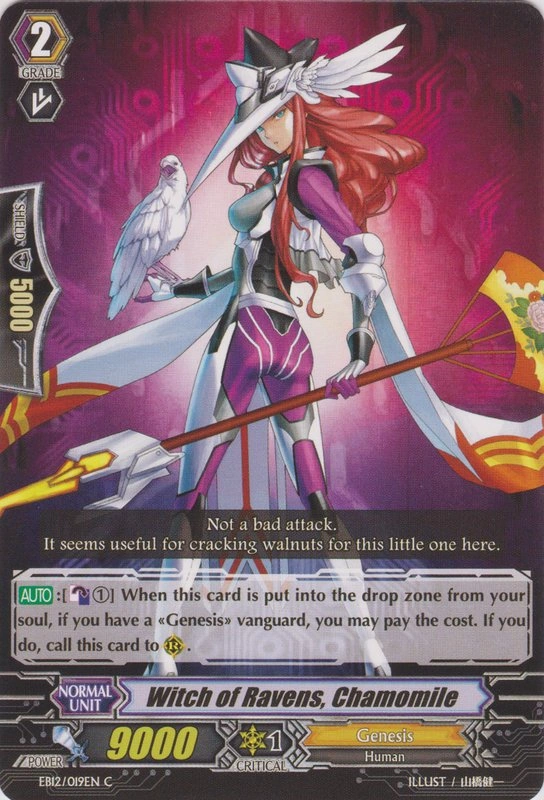
Witch of Ravens, Chamomile x 3

G1
Goddess of Decline, Hel x 4
Mythic Beast, Skoll x 4
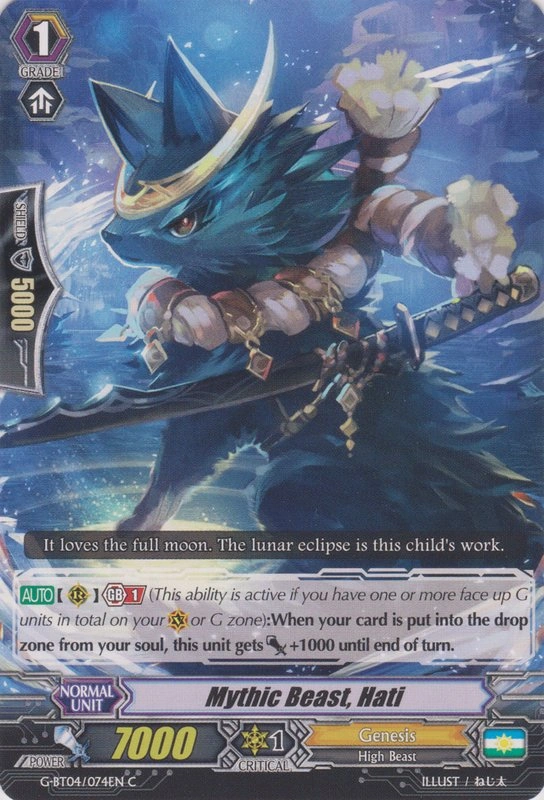
Mythic Beast, Hati x 4
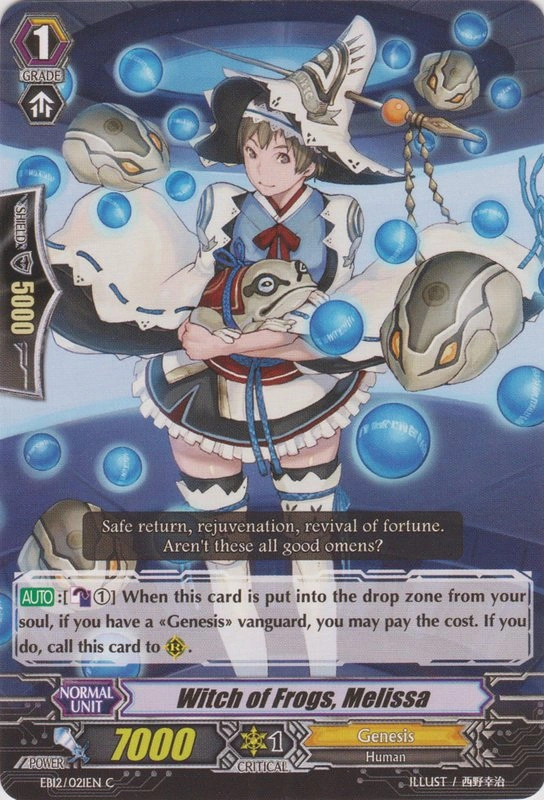
Witch of Frogs, Melissa x 2

G0
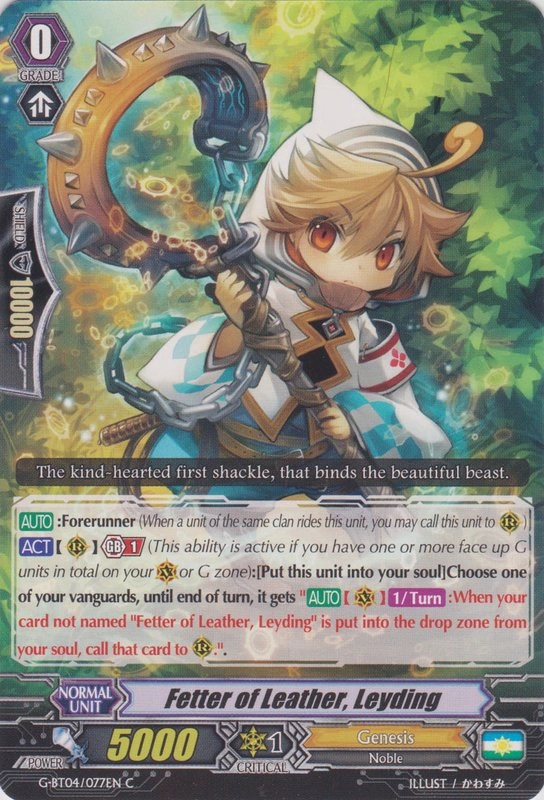
Fetter of Leather, Leyding x 1
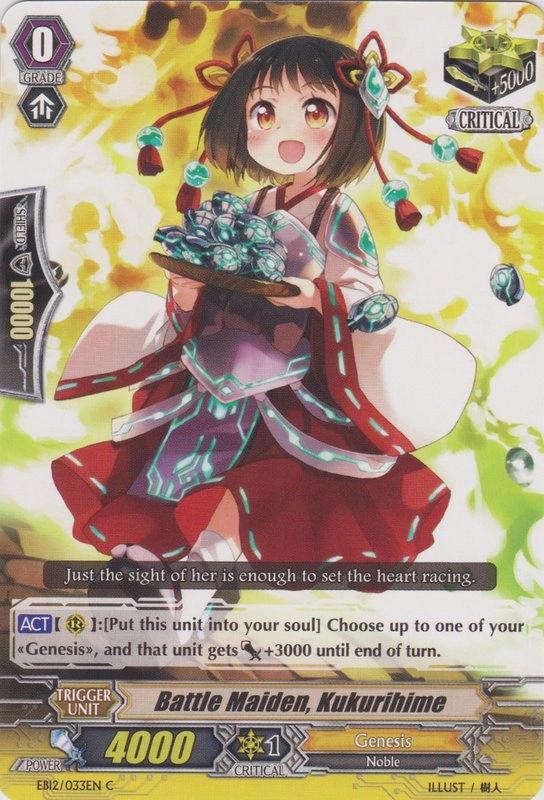
Battle Maiden, Kukurihime x 4
Witch’s Familiar, Shiroma x 4
Crits of your choice x 2
Dreaming Dragon x 2
Heals of your choice x 4

Main Focus: This deck focuses on an incredibly strong mid-game, able to quickly change the tempo of the game by forcing a no-guard from the opponent and pushing the opponent to high damage quickly. The deck then combines strong defensive hand advantage and high power RG columns to whittle down the opponent and ultimately aiming to finish with Vanargandr.

This is easily accomplished by creating two RG columns upon first stride (using Doombrace) that guards for 15k each, often tempting the opponent to no-guard on the first RG attack or force a sub-optimal guarding. The first stride technique is also incredibly consistent thanks to the ability of Fenrir and the starter to call out 2 units immediately upon first stride.


Starting off with the main boss unit of the deck: Mythic Beast, Fenrir soul charges whenever you stride and gives you a 1/turn ability to call a unit which you soul blasted that turn. This helps to generate field advantage and ensure a consistent stream of rearguards to mount an
offensive. Great Angel, Doom Brace synergises well with Fenrir, allowing you soul blast units out and call them with Fenrir’s skill as well as powering up existing rear guards on the field.


Mythical Destroyer Beast, Vanargandr grants you the ability to look at the top few cards of your deck before you drive check and rearrange them at the top or the bottom. This serves not only in netting triggers but also improves the quality of your drive check, allowing you the option of digging for more useful cards. You should only stride this unit when you have either Mythic Snake, Jormungand or Mythic Beast, Hati on both rearguard lanes OR you have no rearguards for Doom Brace’s power boost. This is because when both Hati or Jormungand are on the field, they gain +1k power for each soul-blasted unit, netting you an additional 6k power when Vanargandr's effect is triggered. Otherwise, Doom Brace's +5k power is the better and more consistent option.


Oracle Queen, Himiko and Omniscience Regalia, Minerva are the backup G3s for the deck. Break riding Minerva on Himiko allows her to utilise the break ride skill to soul blast twice to draw a card, given enough soul. This evokes the threat of a restanding vanguard coupled with powered-up rearguard lanes. If you have strode twice and know that the opponent has a
PG and few G0s, you can also break ride Fenrir on Himiko, activate his guard restrict skill and prevent the opponent from guarding with a PG.


Mythic Snake, Jormungand and Mythic Beast, Hati will form the core of your offense. They have the ability to gain power for every card soul blasted that turn.


Unappeasable Biter, Gleipnir is the backup soul charger should you fail to ride Fenrir. He can also net you card advantage if you soul blasted that turn.


Witch of Ravens, Chamomile and Witch of Frogs, Melissa can be called out by themselves when soul blasted. This helps to counter heavy field disruption decks and ensures that you are not too reliant on Fenrir for rearguards. Furthermore, since Fenrir is a 1/Turn skill, you can use these two cards to call out multiple RGs, enabling you to fill your field more easily.


Fetter of Leather, Leyding goes into the soul and allows you to call out another unit when you soul blast that turn. Coupled with Fenrir, it ensures that you can call out at least 2 units from the soul on your first stride.


Battle Maiden, Kukurihime is the emergency go-to card when you lack just a tiny bit of soul.


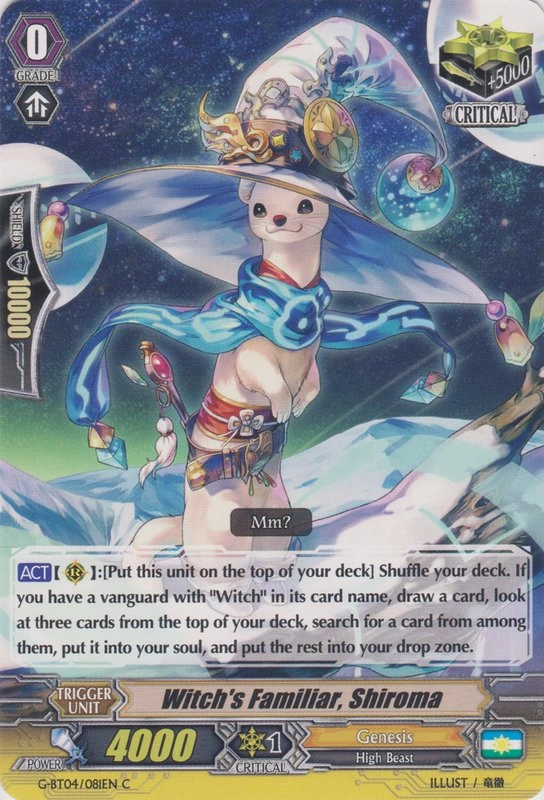
Witch’s Familiar, Shiroma’s effect will only work when you have a Witch vanguard. This card helps to fix a trigger-flooded opening hand as well as helping to soul charge.


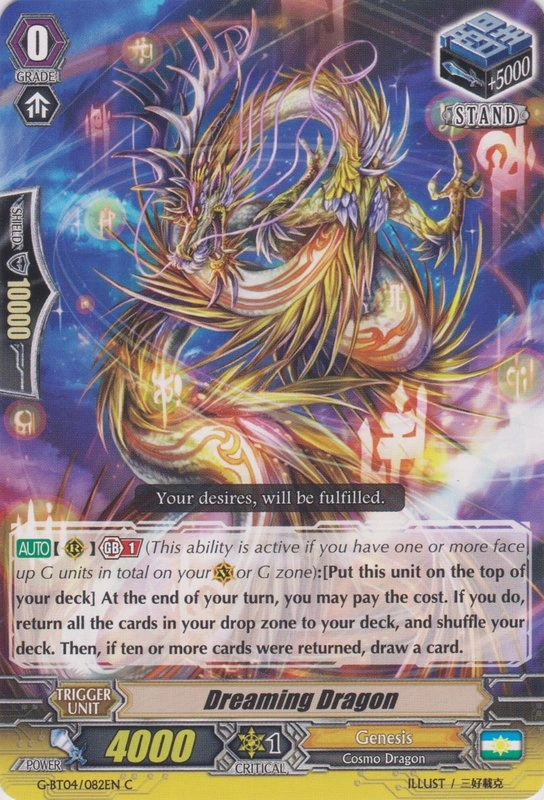
Genesis decks have always faced the issue of soul charging too much and decking out. The turnover in cards for G-Genesis is especially high due to the fact that you draw 1, soul charge 3 with Fenrir's skill, and triple drive (average 7 cards/turn). Dreaming Dragon allows you to return your drop zone to your deck, essentially refreshing your deck and allowing you to prolong the game, while allowing you to draw another card for an overall neutral outcome. This is critical against tanky and grindy decks which try to deck you out. Another benefit of this card is the potential to increase the trigger ratios in your newly-refreshed deck. Hence, it is possible to focus on soul blasting triggers and key cards such as PGs that you may have unfortunately soulcharged so that you can return them later to your deck. Optimally, try to keep this unit in your soul and bring it out with Fenrir when you need it. Do run only 2 of it.


Overall, this deck is great at accomplishing what it was set out to do-create power columns that quickly push your opponent to late game. Utilising a strong defensive hand advantage achieved from conserving the no of units that needs to be called from hand to the field, high power RG columns with Doom Brace enable you to gradually whittle down your opponent's hand and then push for the finish.

Vanargandr as G-Genesis's ace deserves special mention because it is incredibly powerful since it forces your opponent to perfect guard it or no guard it. Since the Genesis player knows exactly what is on the top 4 cards of his deck, it is incredibly easy for the Genesis player to create conditions that will permit him to break his opponent's defence.

If the opponent guards for 2 pass, it is possible for the Genesis player to easily play around it (eg. check top 4, 1 trigger among the 4 cards. Put 3 cards at the bottom to increase chances of checking triggers). Thus, the chances of netting 1 extra trigger is extremely high. Furthermore, since the Genesis player knows that the top card is a trigger, he can easily follow Stride Rule no. 1.

Stride Rule no. 1: Your opponent guards for 2 pass, and you have a Vanguard that does triple drive. If your first drive check is a trigger, you should all-in, because the chance of netting an additional trigger on 2nd or 3rd drive check is high.

In other words, Vanargandr makes Stride Rule no. 1's condition much easier to clear. A smart opponent will perfect guard it. If no perfect guard is forthcoming, it is much better for the opponent to take his chances by no-guarding because it is so much easier for Genesis player to fulfil the 2 pass condition. Furthermore, when combined with strong RG lanes (which can be achieved with Hati and Jormungand), it means that the opponent will probably have to take a lot of damage or lose a lot of hand size when he faces Vanargandr as a strong centre lane.

So the moral of the story is that Vanargandr when combined with double guard 15k RG columns at high damage is pretty fearsome. The opponent is confronted with a very bad catch 22 situation with few ways to escape unscathed unless he is at low damage. 

This G-Genesis decklist was kindly provided to me by Zhi Wei, a fellow Vanguard player and friend. This article was jointly written by Zhi Wei and me.